NetSuite
Prerequisites
Zenskar uses token-based authentication (TBA) for connecting with a NetSuite account. You must enable a few features in NetSuite before attempting to connect Zenskar with NetSuite:
- On the NetSuite dashboard, go to Setup > Company > Enable Features.
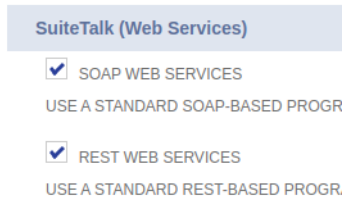
- On the horizontal menu, go to SuiteCloud. Now go to the SuiteTalk (Web Services) subsection and select REST WEB SERVICES.
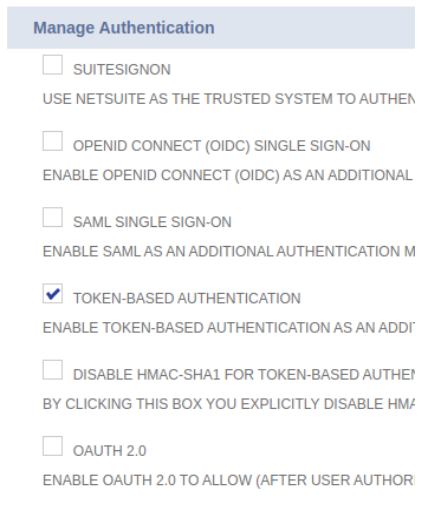
- Go to the Manage Authentication subsection and select TOKEN-BASED AUTHENTICATION.
- Save the changes.
- Create a new integration which will handle all requests from Zenskar. For creating a new integration, go to Setup > Integration > Manage Integrations > New.
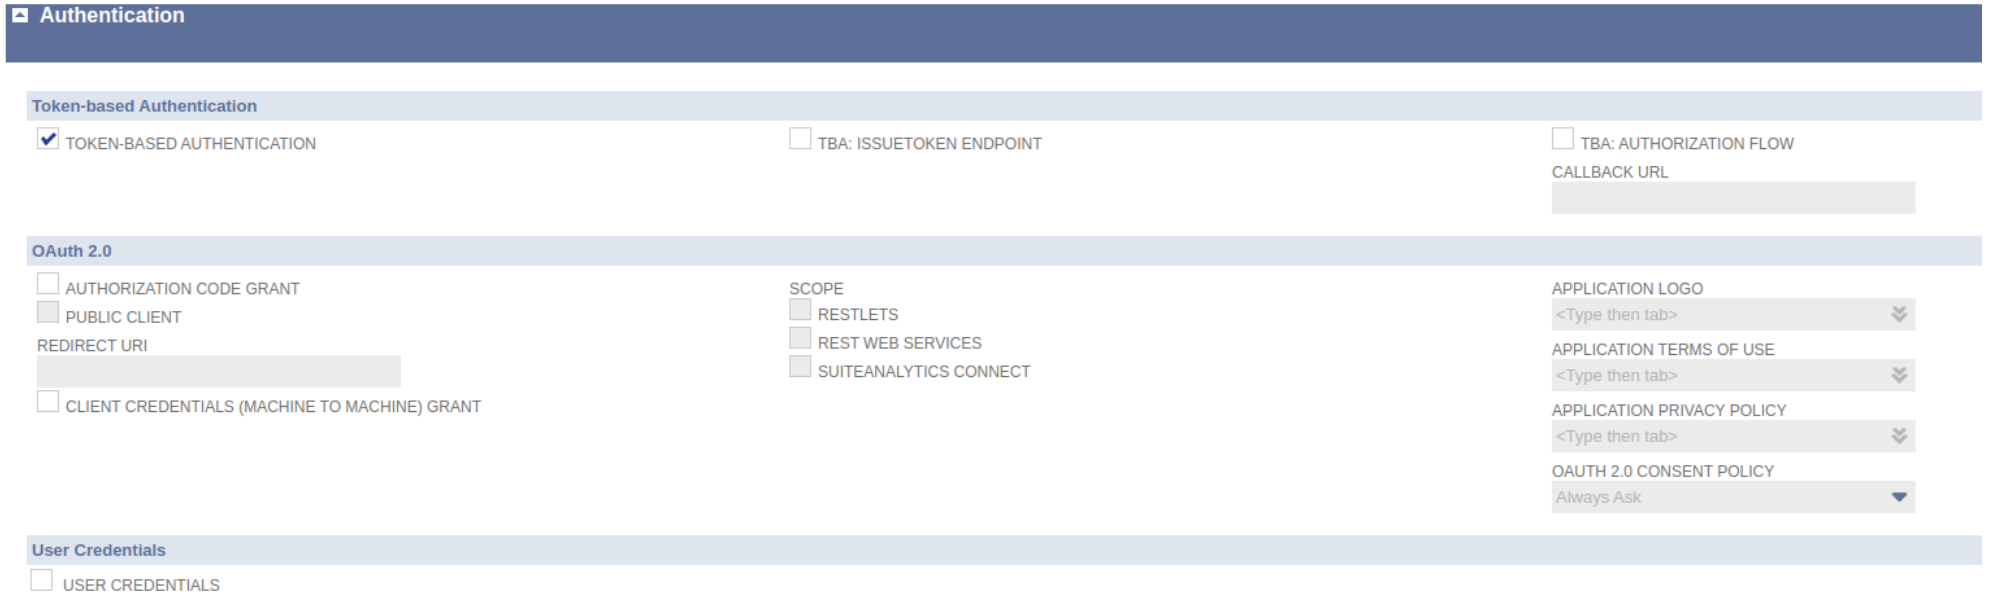
- Give a suitable name to integration and leave the state as enabled. Now set the authentication settings, as shown below.
- Save the integration. After saving, you would be provided the consumer key and consumer secret for the integration. Please note this.
- In the next step, we will issue an access token to a user which is already added to the client’s NetSuite account. Before issuing the access token, please ensure the user has all the necessary permissions to use Rest Web Services. More details about the user roles on Netsuite can be found here.
- For issuing the access token, from the NetSuite homepage scroll down and in the bottom left corner you can find Settings. Go to Settings > Manage Access Tokens. Now choose the integration that was created in the previous setup and appropriate token name. Once done, you would be provided with the Token Id and Token Secret. Please note them as well.
- Clients also need to note the NetSuite account id and company URL which could be found inside the Setup > Company > Company Information. Account ID will be visible on this page. Go to the Company URLs sub tab to get the company URL. Please note the company URL corresponding to SUITETALK (SOAP AND REST WEB SERVICES).
Integrate NetSuite with Zenskar
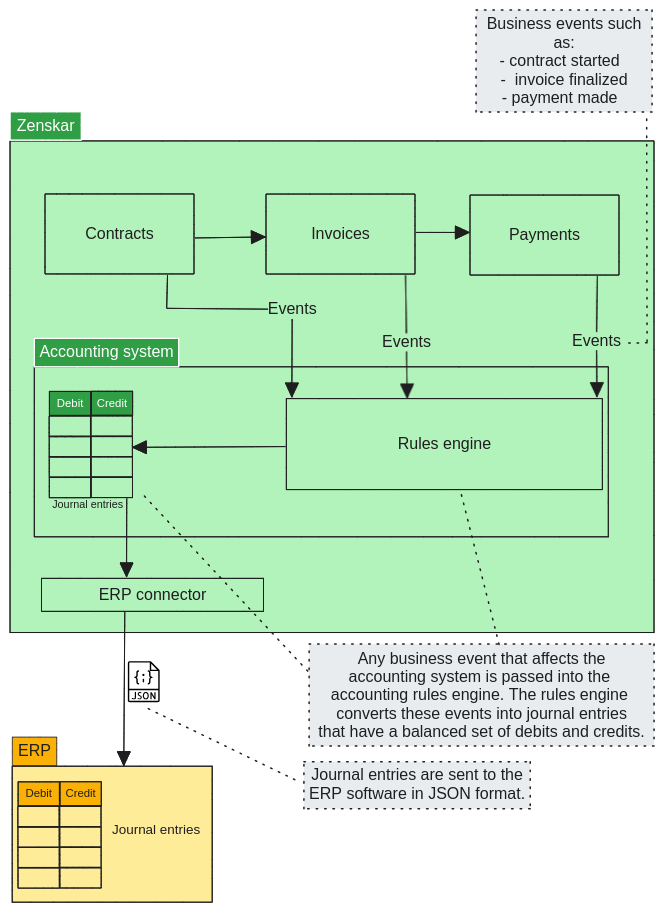
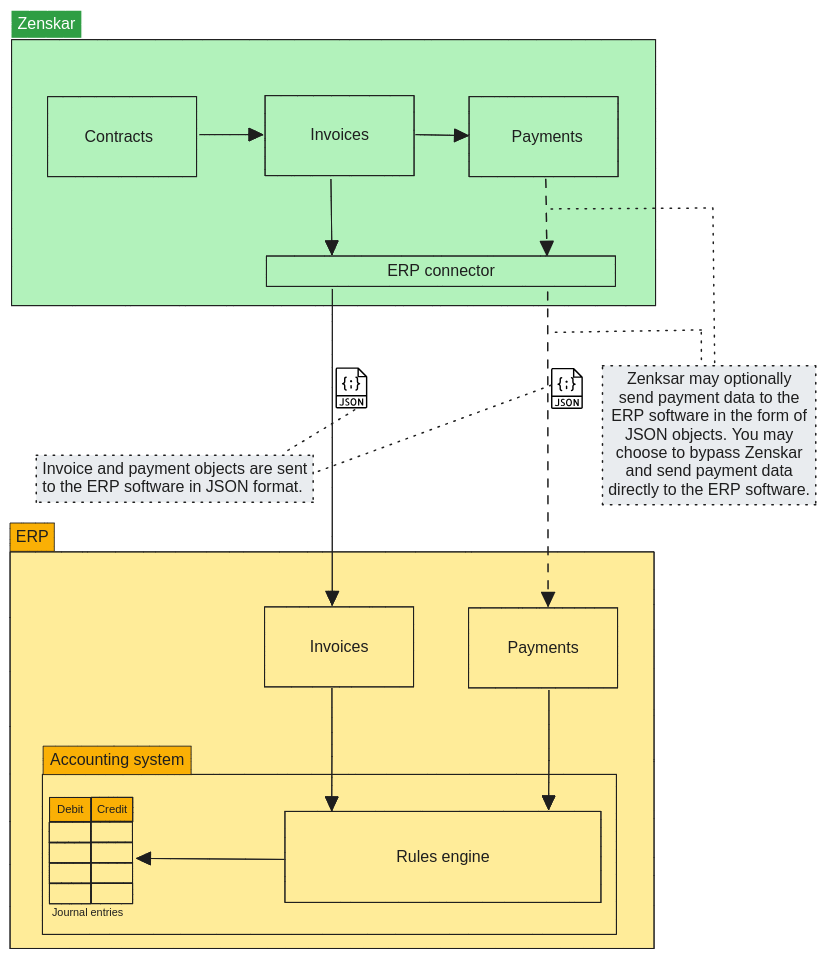
Option 1: use Zenskar's accounting system to generate double-entry journal entries
You may use Zenskar's accounting system to generate double-entry journal entries. These journal entries can be synced with NetSuite using Zenskar's NetSuite connector.
Option 2: use the accounting system of the ERP software
You may use the accounting system of the ERP software to generate journal entries. Zenksar can send data related to invoices and payments (optional) to NetSuite as input.
Set up Zenskar's NetSuite connector
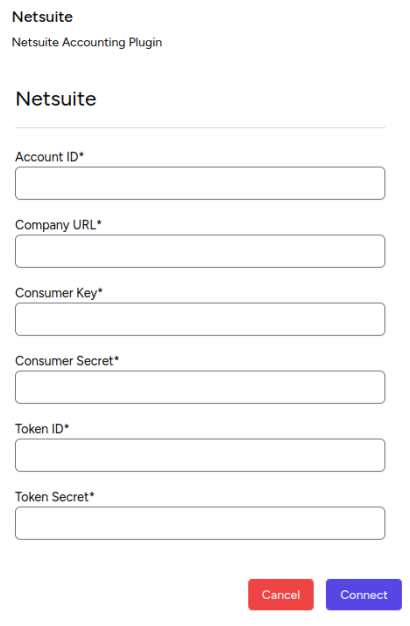
- Go to Settings > Connectors and click on Connect button for the NetSuite connector card.
- Enter the following details:
Configure Customer Sync
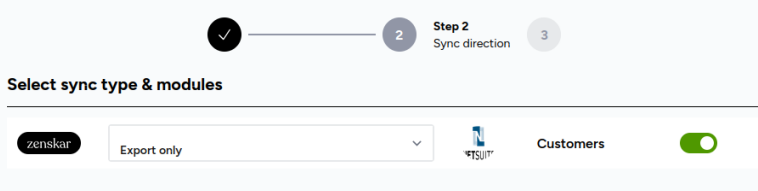
- Once NetSuite gets connected, click on the Manage button to configure the customers sync.
- Turn on the Customer Sync on the configuration page
- Click on Next. On this page the client needs to select the Company subsidiary in which all the customers from Zenskar will be created.
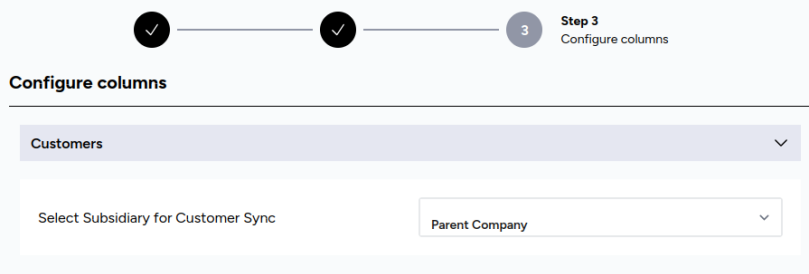
- Click on Configure and the customer sync is enabled for NetSuite.
Updated 3 months ago