Business entities
A business entity is a company wholly controlled by another company called a holding company or parent.
DefinitionIn Zenskar, a business entity is a company wholly controlled by another company called a holding company or parent. A business entity is also known as a subsidiary.
In Zenskar, an organization is the holding company or parent that wholly controls all business entities.
Organization
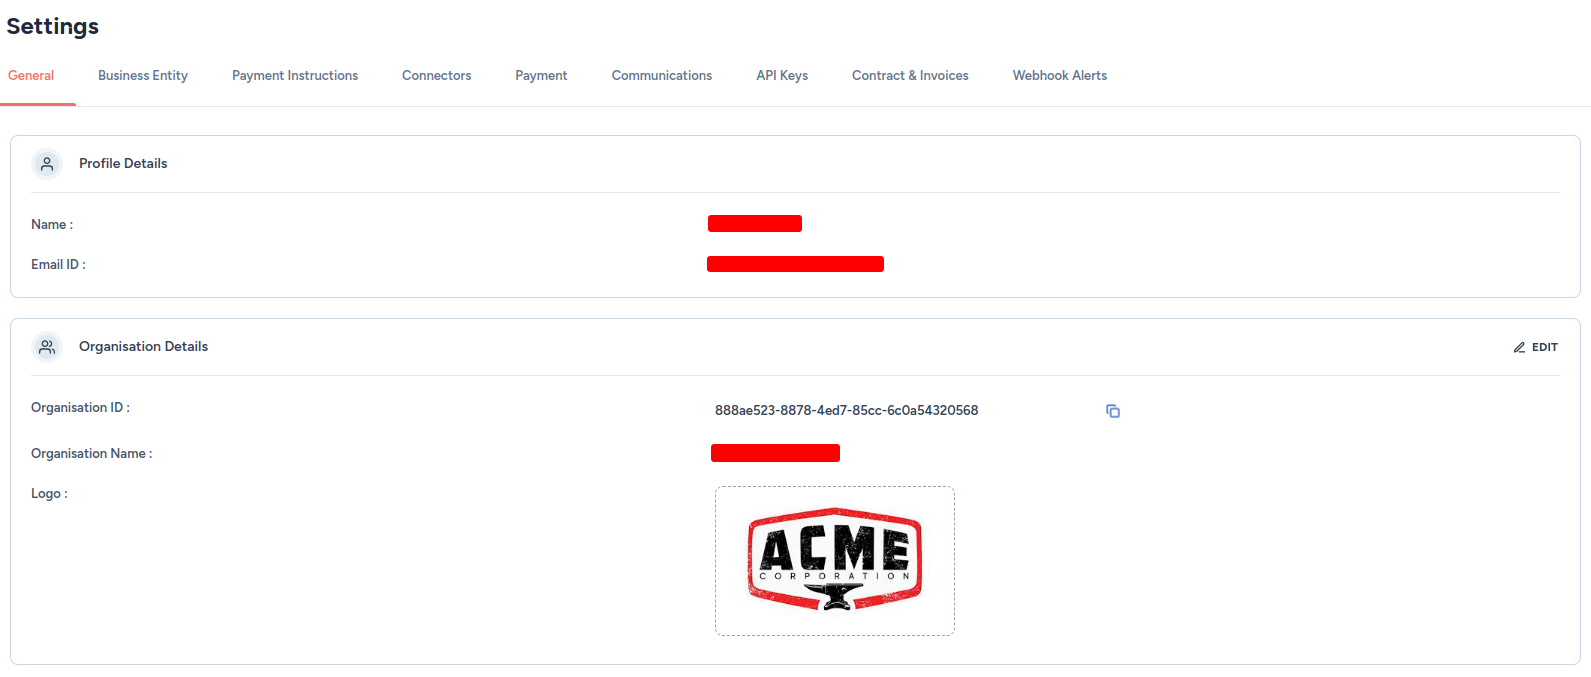
An organization is created in Zenskar when you create an account. To view the organization details, do the following:
- Click on the drop-up menu with your name, as shown below.
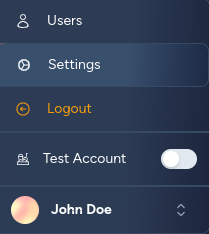
- Click on the Settings option.
- The organization details are shown in the General tab of the Settings page, as shown below.
Business entities in Zenskar
A default business entity is created for every organization.

View business entities
- On the Settings page, move to the Business Entity tab.
- All business entities will be listed, as shown below.
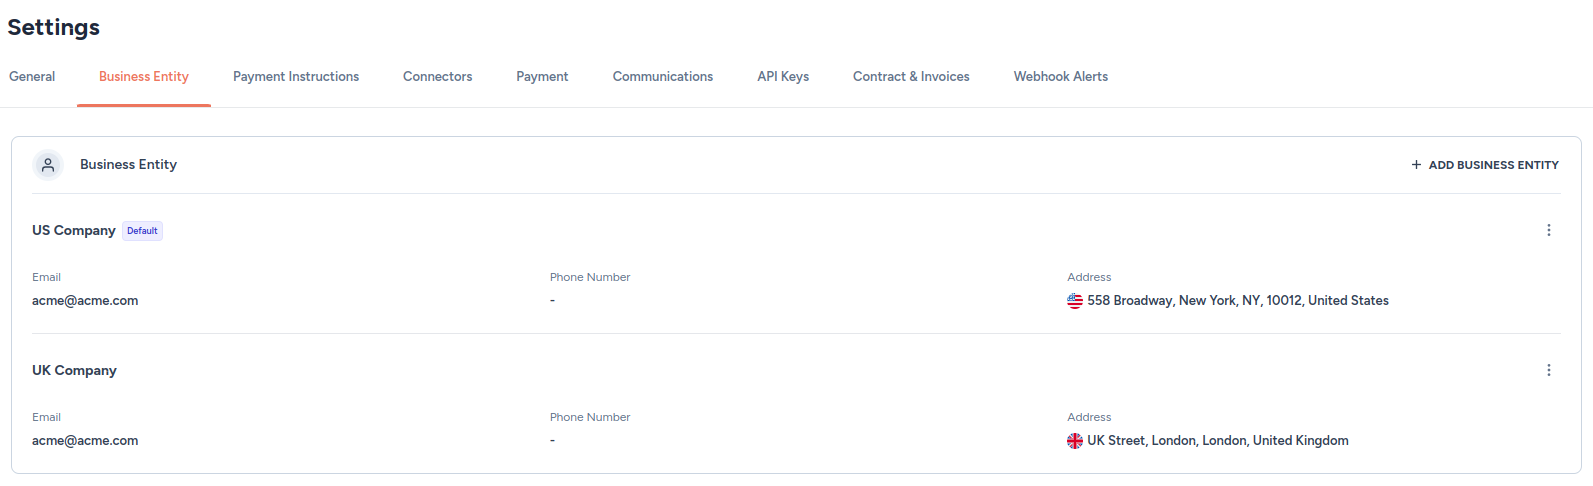
NoteA newly customer is automatically assigned to the default business entity.
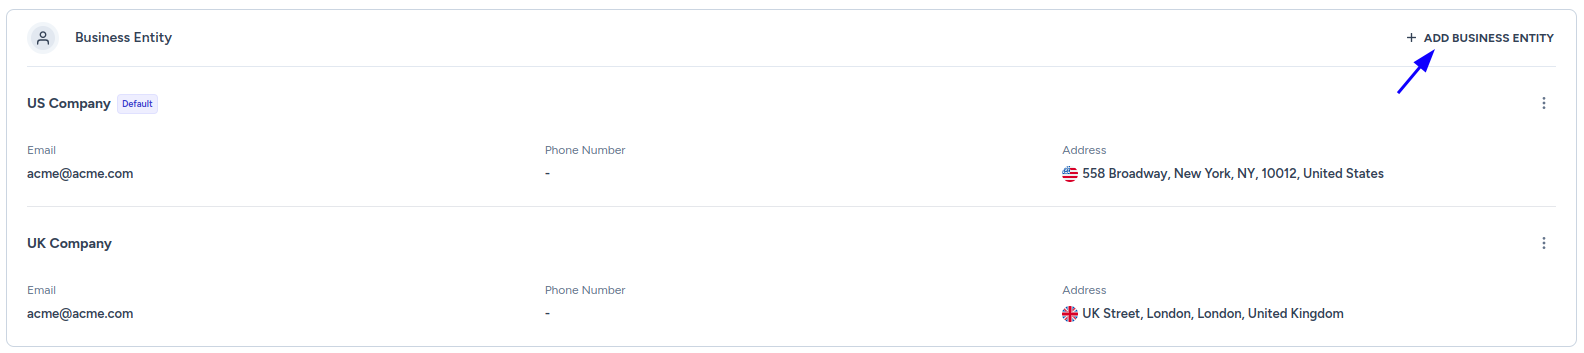
Add a business entity
- On the Settings page, move to the Business Entity tab.
- Click on the + ADD BUSINESS ENTITY button.
- Fill in the following details:
- Entity name (required)
- Email of the entity (required)
- Phone number
- Address, including city, state, and zip code
- Country (required): United Sates (USA) is the default
- Set as default business entity
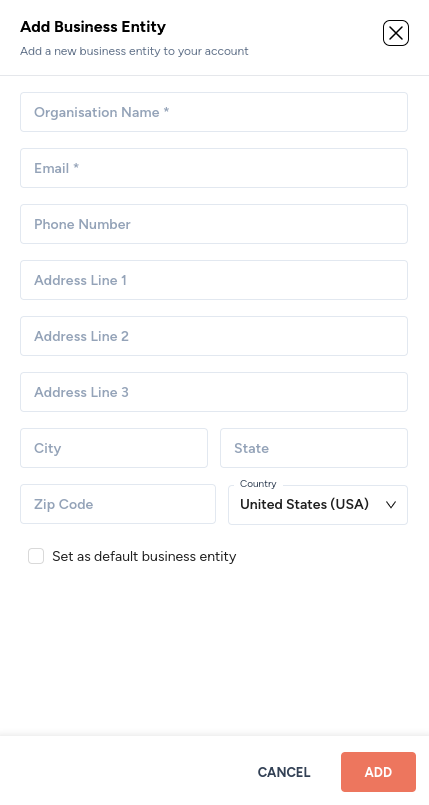
- Click ADD.
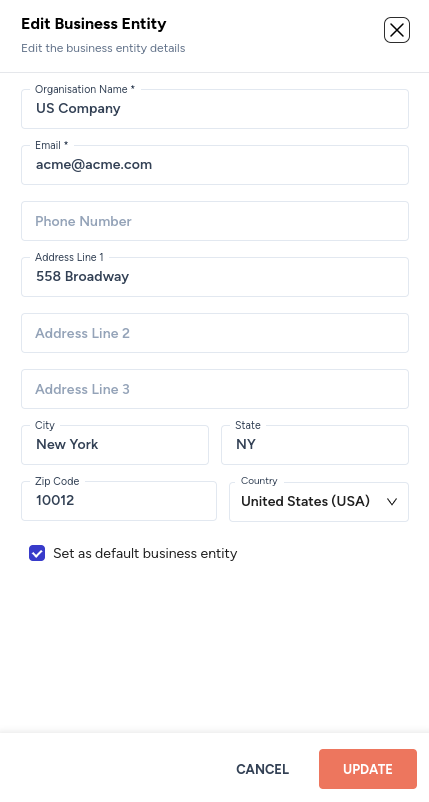
Edit a business entity
- On the Settings page, move to the Business Entity tab.
- Click on the kebab menu located at the end of the row containing the business entity you are interested in, as shown below.
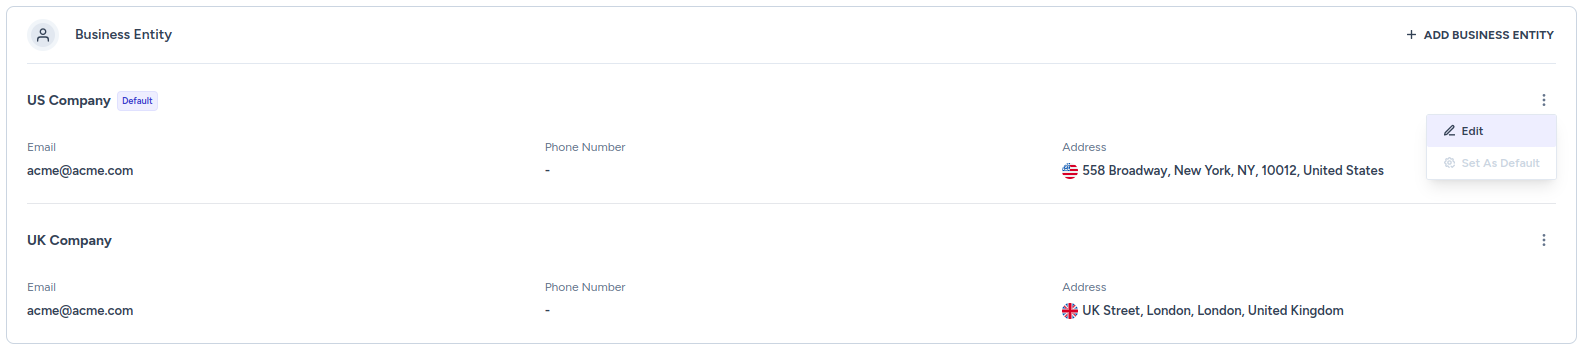
- Edit any of the following details:
- Entity name (required)
- Email of the entity (required)
- Phone number
- Address, including city, state, and zip code
- Country (required): United Sates (USA) is the default
- Set as default business entity
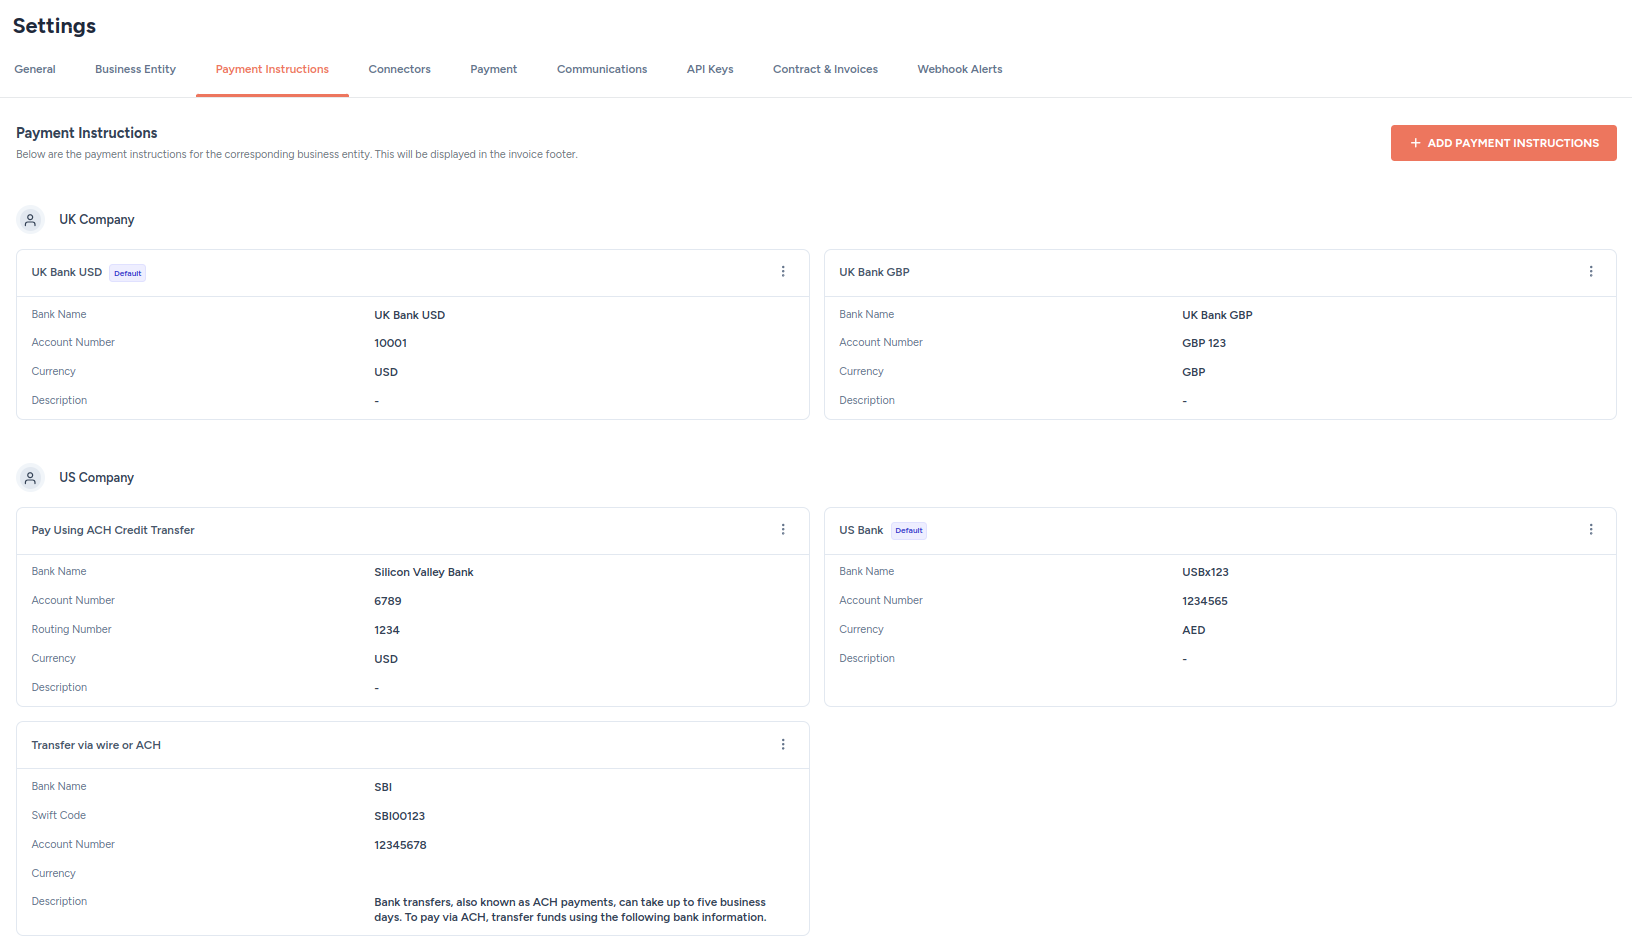
Set up payment instructions for business entities
- On the Settings page, move to the Payment Instructions tab.
- Click on + ADD PAYMENT INSTRUCTIONS.
- Add the following details:
- Entity: from the drop-down menu, select the entity to which you desire to add payment instructions.
- Currency: from the drop-down menu, select the currencies for which you would like to use this payment instruction.
- Title: enter the title of the payment instructions.
- Description (optional): enter a description for the payment instructions.
- Set as default business entity
- Bank details: add bank details in label–value form. These details will be displayed on the invoice.
- Bank name: enter the bank name.
- Account number: enter the bank account number.
- Click on + ADD FIELDS to add more
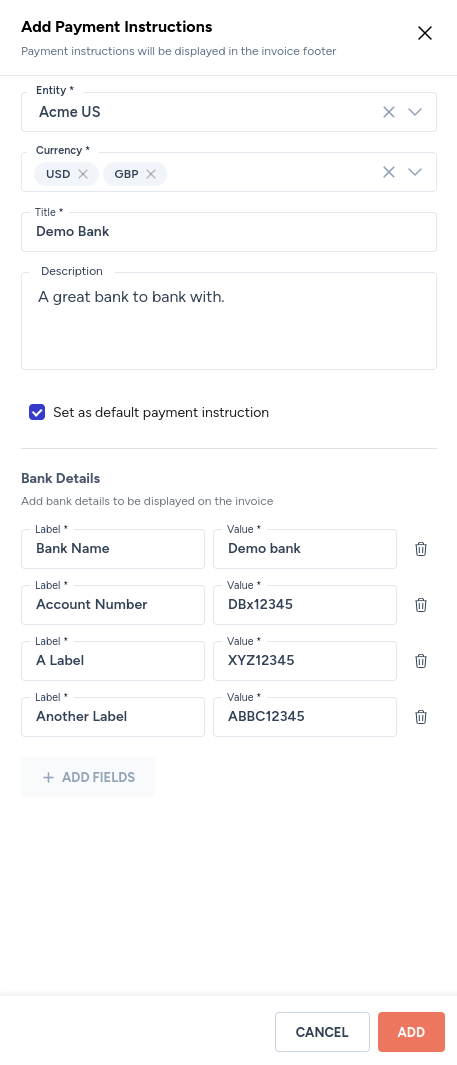
- Once added, all payment instructions can be viewed in the Payment Instructions tab.
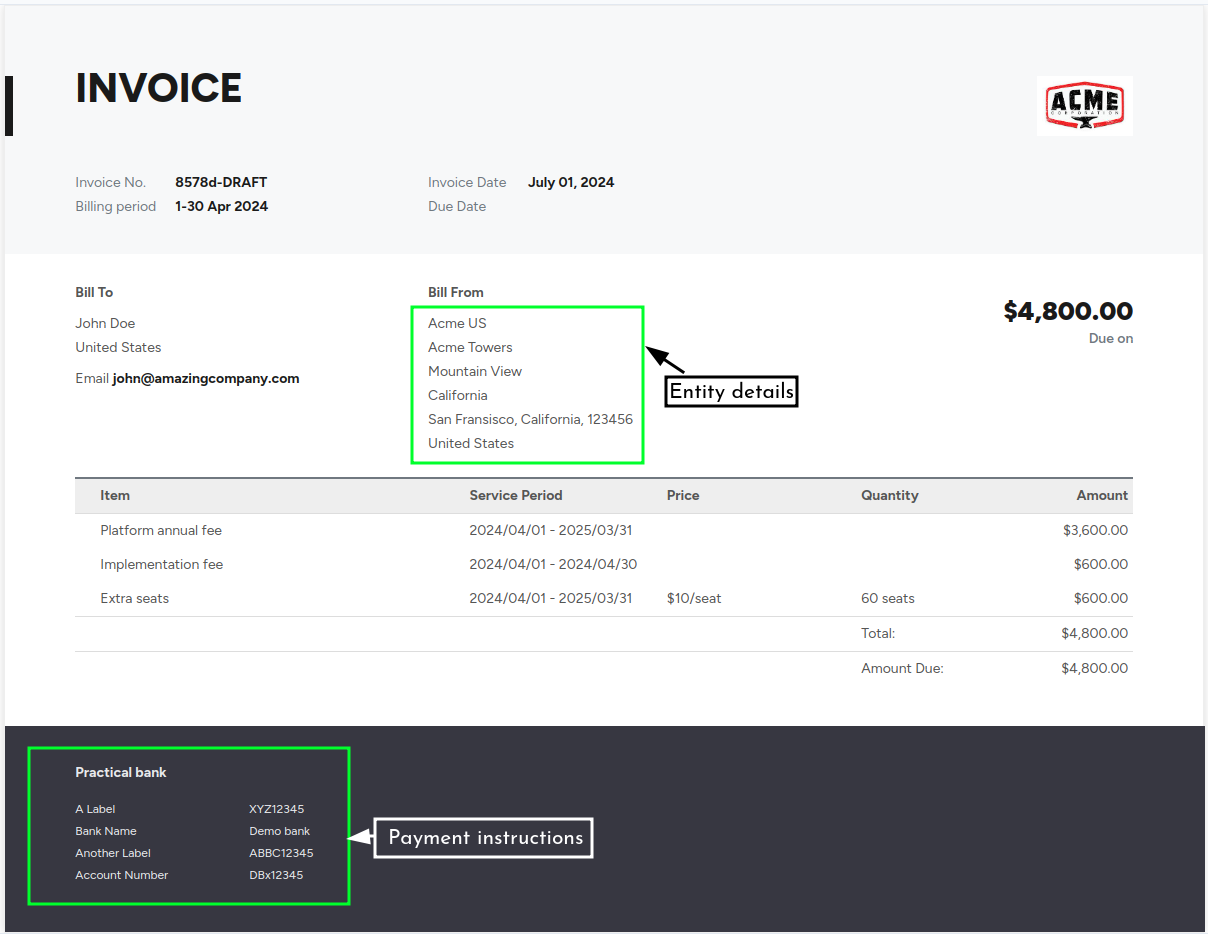
Entity details and payment instructions displayed on the invoice
Updated 5 months ago
Did this page help you?