Prepaid commitment with postpaid overages
An example-based guide that helps you create a prepaid-commitment-with-postpaid-overages contract and generate invoices
This is an example-based guide to help you understand the prepaid commitment with postpaid overages business model. You may use this guide as a starting point to build a bespoke template and/or contract.
The example
You are an artificial intelligence SaaS provider that helps relocation service providers perform virtual household surveys.
Contract details
Your customer chooses the Silver Survey Plan contract:
| Service | Fees |
|---|---|
| Up to 25 end-user surveys | $ 850 per month |
| Unused surveys | Credited for future use, but no refunds |
| Additional surveys | $34 per survey |
| Onboarding and support | $ 400 per year |
Create a contract
You can create a contract using a contract template as base or you can create a contract from scratch.
Create a contract using a contract plan as base
Why create a contract plan?A contract template is reusable. That is, a contract template can be used to create bespoke contracts. You can create a contract without creating a contract template.
Read the Zenskar contract plan documentation for better understanding.
The contract explained in the previous section needs to be translated into a Zenskar contract template.
Product | Pricing model | Details |
|---|---|---|
Silver Survey Plan | Flat fee (refer: how to create a flat-fee product. | $ 850 |
Previous month overages | Per-unit pricing (refer: how to create a per-unit-pricing product) | $ 34 per survey |
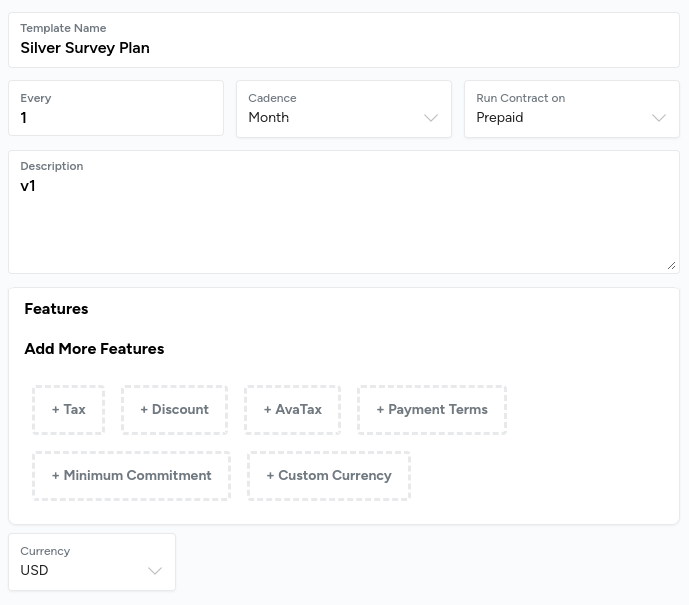
You can create a contract template with the following properties:
- Template name: Silver Survey Plan
- Billing cadence: Monthly
- Contract type: Prepaid
- Currency: USD
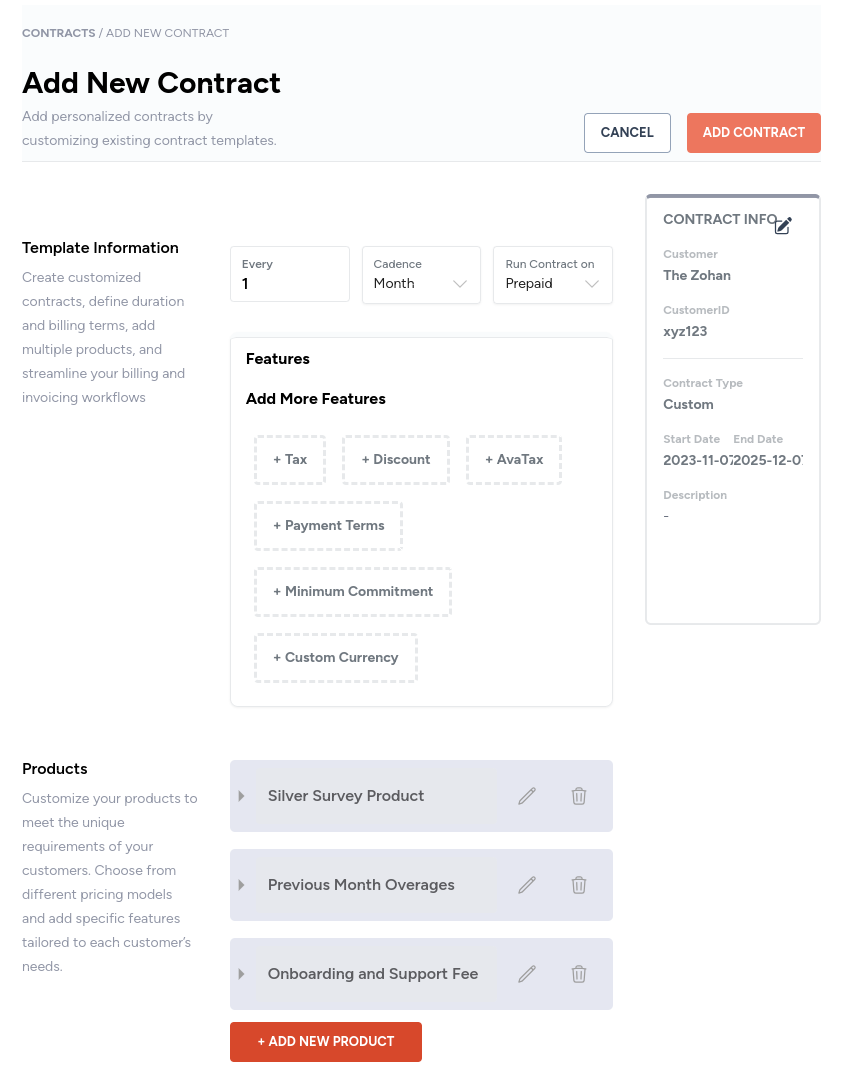
Product 1: silver survey plan
| Service | Fees |
|---|---|
| Up to 25 end-user surveys | $ 850 per month |
The first product of your contract plan addresses the first clause of the contract and has the following properties:
- Product name: Silver Survey Product
- The following product settings help the product inherit the global contract template settings:

- Billing cadence: inherits the monthly billing cadence from the contract template settings
- Contract type: inherits the prepaid contract type from the contract template settings
- Pricing model: Flat Fee
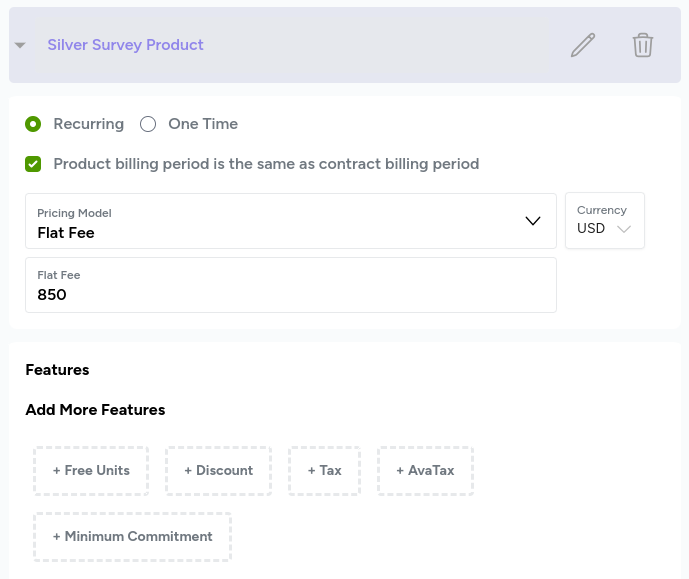
NoteWe have not added an important contract condition to this product: the flat-fee is applicable to 25 end-user surveys. This condition is handled in the next product.
Product 2: previous month overages
| Service | Fees |
|---|---|
| Additional surveys | $34 per survey |
| Unused surveys | Credited for future use, but no refunds |
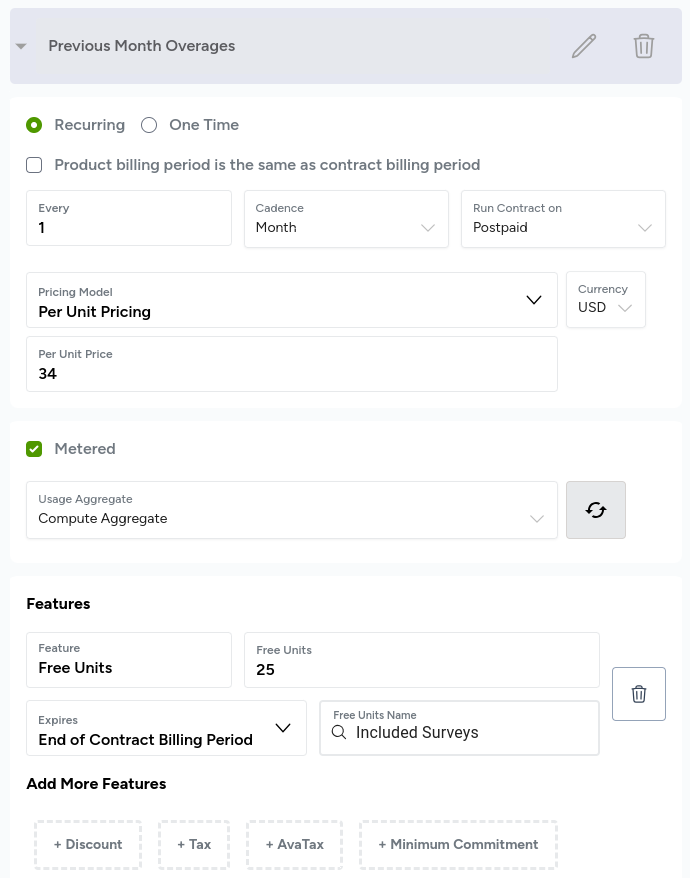
This product of your contract template addresses the second and third clauses of the contract and has the following properties:
- Product name: Previous Month Overages
- The following product settings help the product deviate from the global contract template settings:

- Billing cadence: monthly billing cadence
- Contract type: postpaid (as opposed to the prepaid contract type of the contract template)
- Pricing model: Per Unit Pricing
- Metered: overages are calculated
- Usage aggregates: the usage or consumption aggregates that will help in determining the charges
Features
- Free units: 25
NoteThis product covers an important contract condition in the Free Units feature: the flat-fee is applicable to 25 end-user surveys.
- Expiry: at the end of the contract billing period, the unused surveys accrued shall expire
Product 3: onboarding and support fee
| Service | Fees |
|---|---|
| Onboarding and support | $ 400 per year |
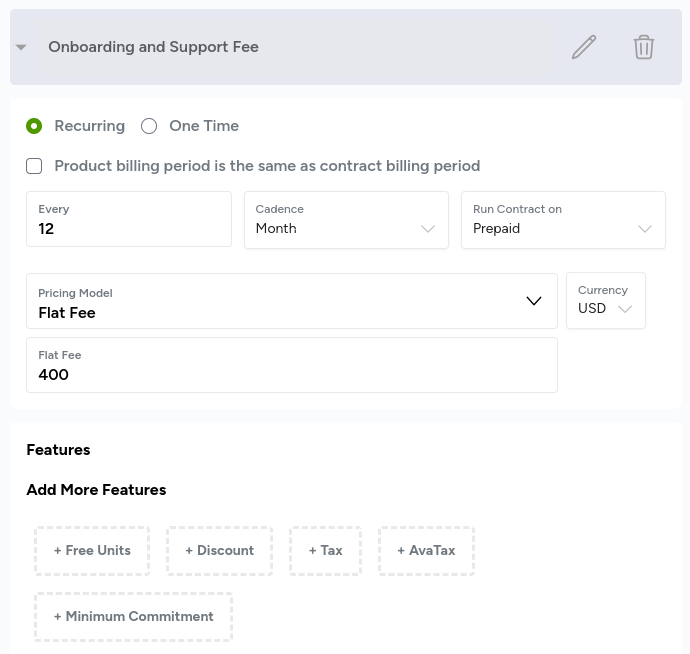
This product of your contract template addresses the second and third clauses of the contract and has the following properties:
- Product name: Onboarding and Support Fee
- The following product settings help the product deviate from the global contract template settings:

- Billing cadence: yearly billing cadence
- Contract type: prepaid
- Pricing model: Flat Fee
The final contract template
You performed the following operations:
- Created a contract temple
- Added products to the contract template to satisfy the contract requirements
The final contract template should look as shown below:
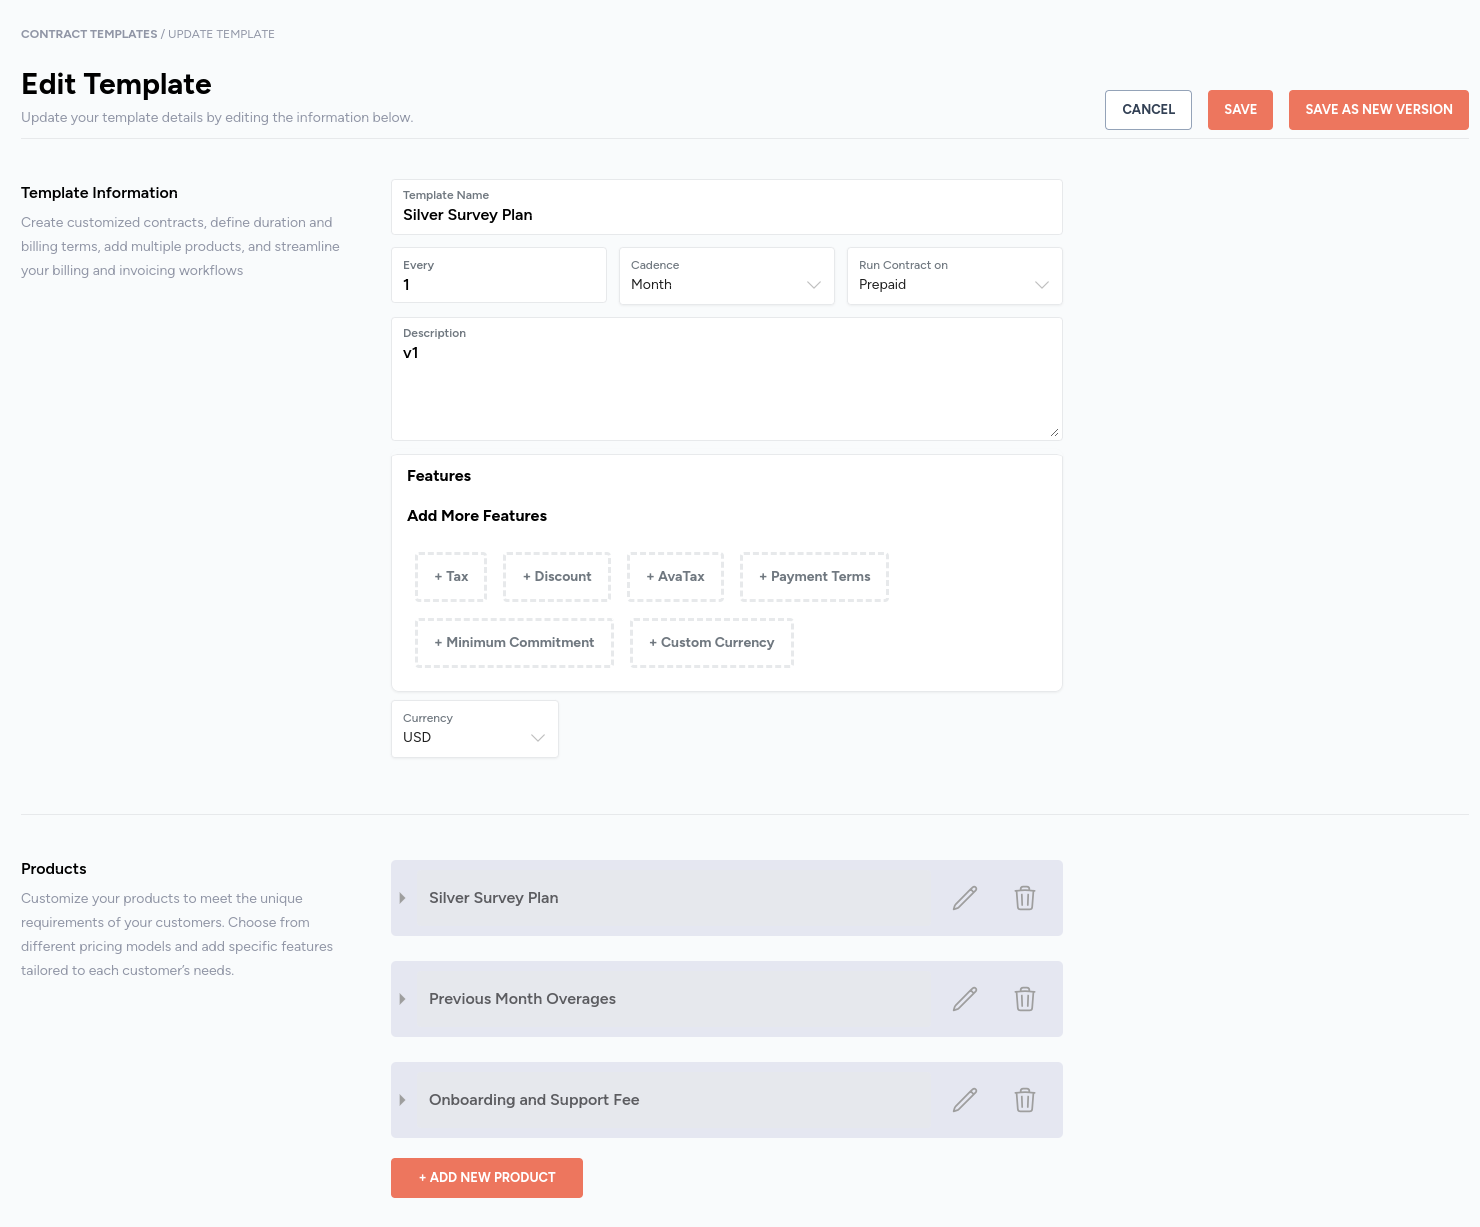
Save the contract template.
Create a contract
- In the side panel, navigate to Contracts > Contracts, and click on the + ADD NEW CONTRACT button.
- Select the Silver Survey Plan contract template, as shown below.
- Fill in the following details:
- Contract name: Silver Survey Plan
- Customer: assign the contract to a customer. You must add customers before performing this step.
- Start date: enter the start date of the contract
- End date: enter the end date of the contract
- Description: add a description
- Currency: select the currency in which you would like to generate invoices
- Billing cycle details: the start date of the billing cycle and the frequency: monthly, quarterly, or annual
- Renewal policy: refer contract renewal documentation
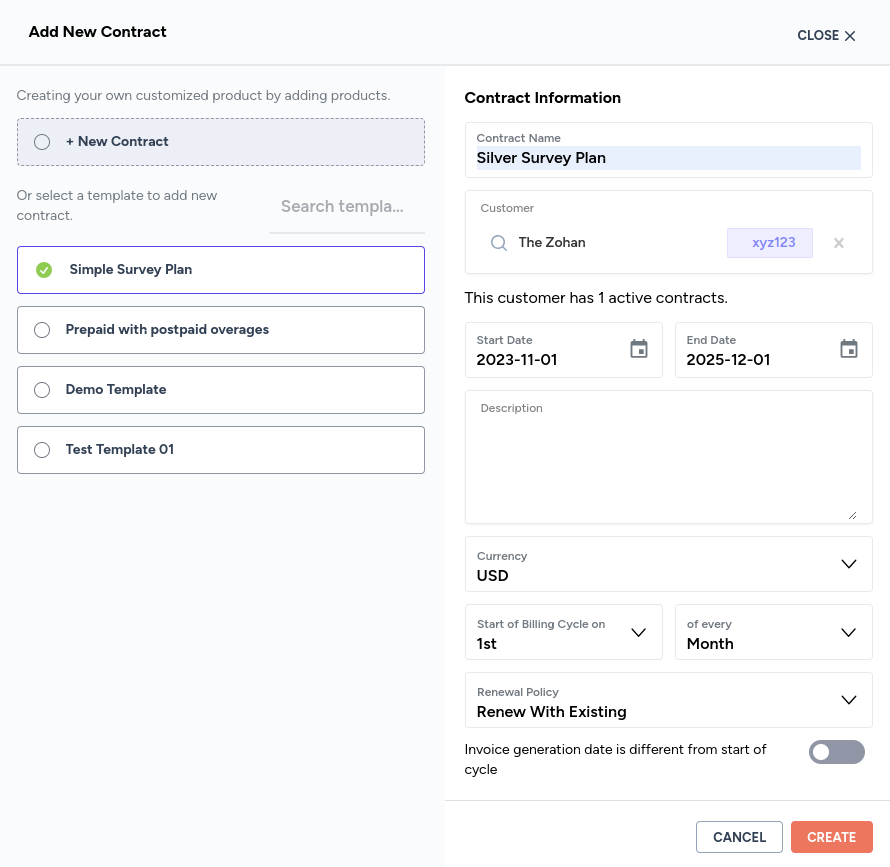
- Click on the Create button.
- Customize the contract:
- change contract template values
- add or remove features
- add or remove products
- Click on ADD CONTRACT button to save the contract.
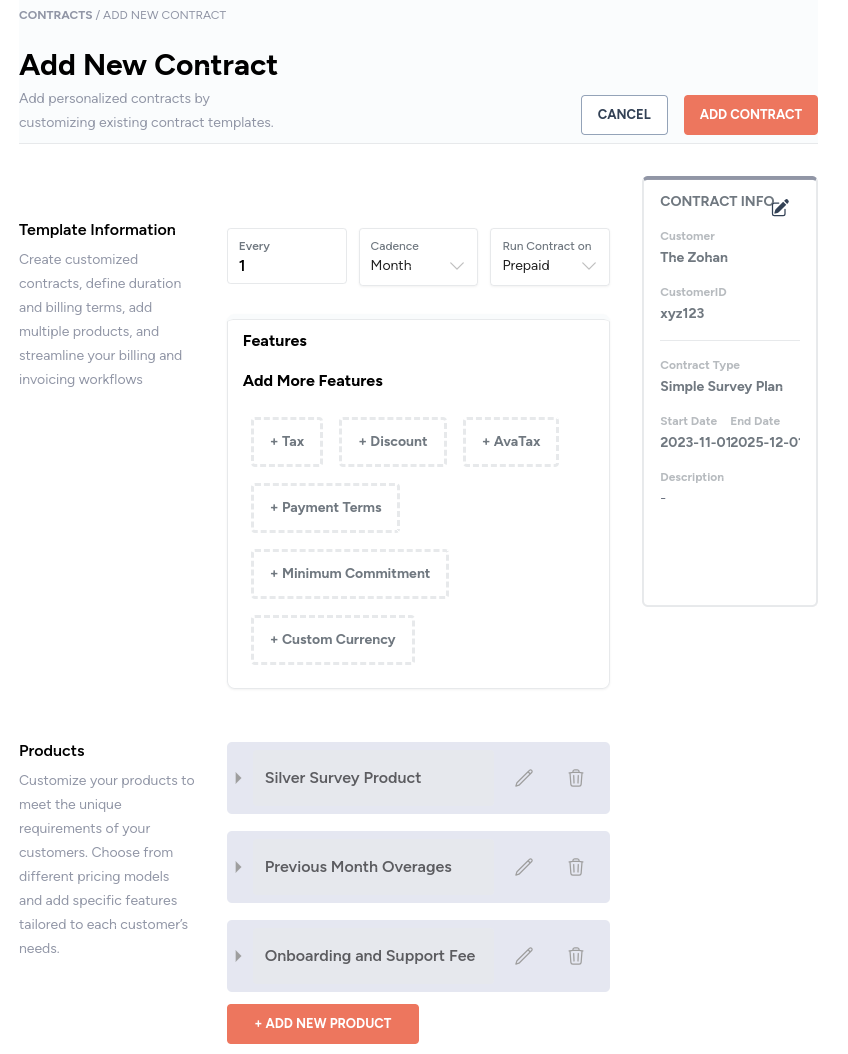
Create a contract without using a contract template
Creating a contract from scratch is similar to creating a contract template.
NoteCurrently, products are created directly in the contract template. This means, products created directly in a contract template are not available in the products module.
In a contract, only existing products can be selected. This means, only products created using the products module can be added to a contract.
Work is in progress to make contract templates behave the same way as contracts.
The process of creating a product, however, is same irrespective of where it is created.
- In the side panel, navigate to Contracts > Contracts, and click on the + ADD NEW CONTRACT button.
- Select + New Contract. The following page will appear.
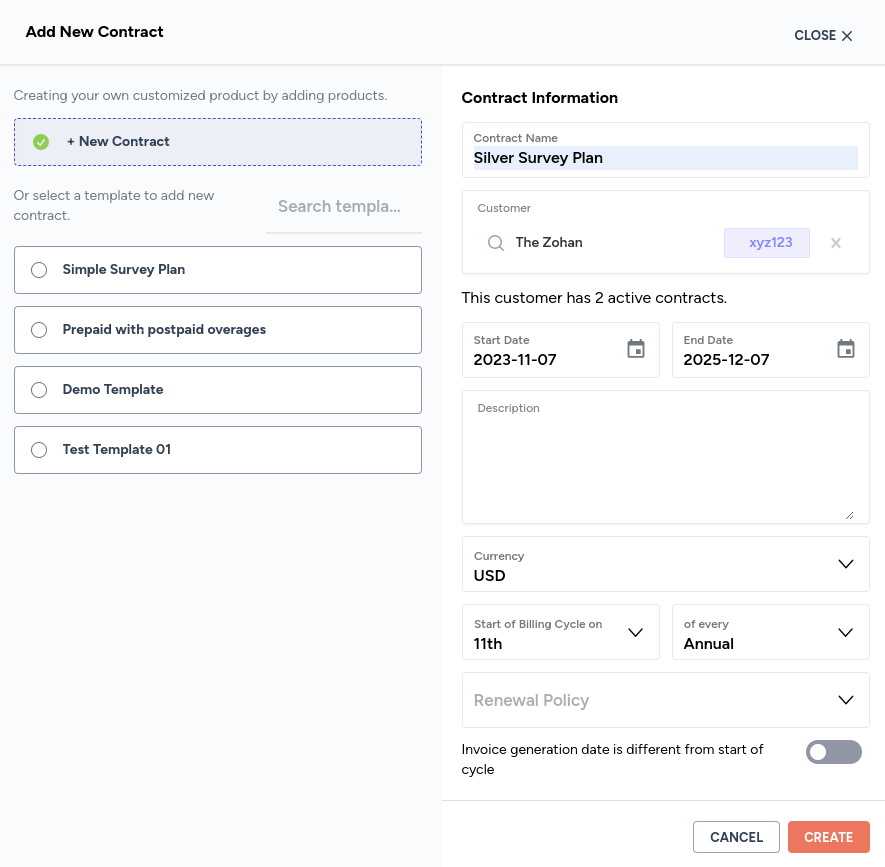
- Fill in the details as described above and click the CREATE button.
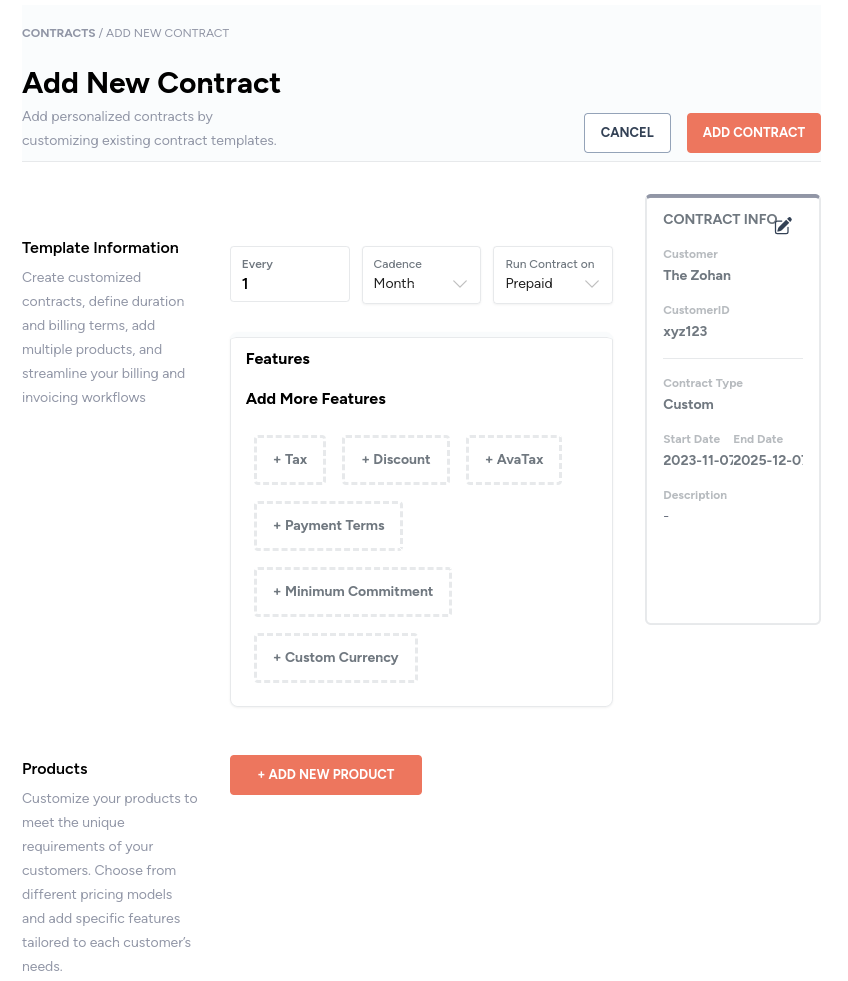
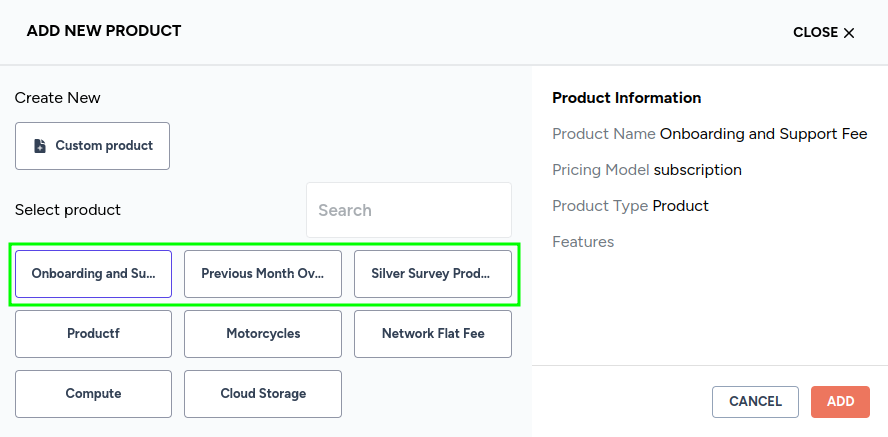
- Click on the +ADD NEW PRODUCT button, and select all applicable products.
NoteOnly one product can be selected at a time. The process must be repeated to add multiple products.
- The final contract is ready with all products included. Click on ADD CONTRACT.
Create an invoice
Invoices will be generated automatically based on the contract settings you configured. However, invoices can be created manually.
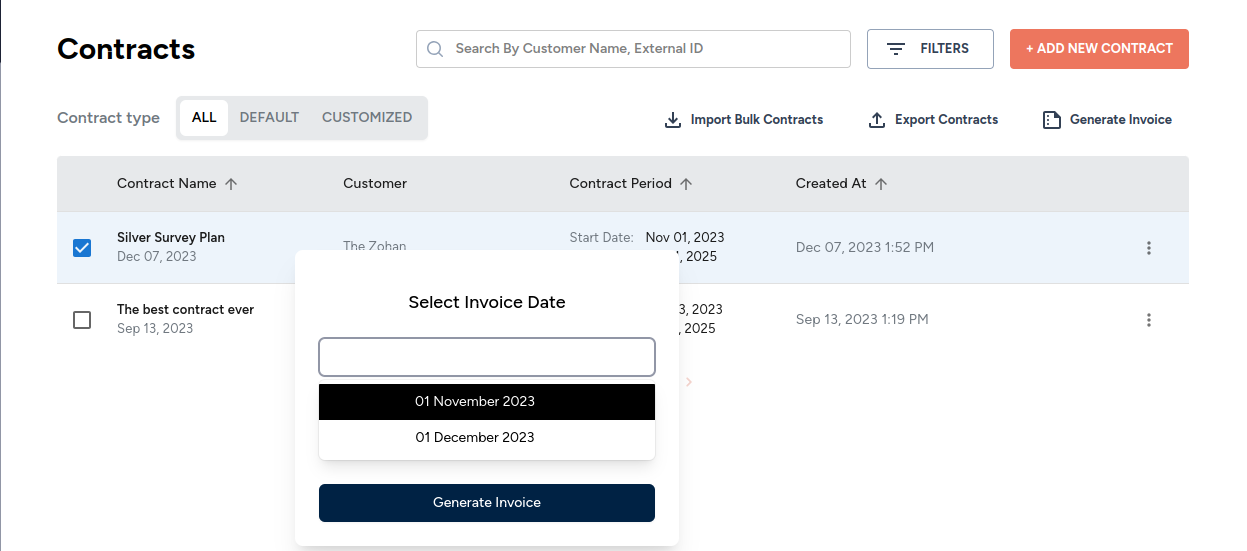
- In the side panel, navigate to Contracts > Contracts.
- Select the desired contract.
- Click on Generate Invoice.
- Select the month for which you would like to generate an invoice.
- Click on Generate Invoice.
- A message appears when the background invoice generation processes is successfully triggered.

- Click on View Invoice to view the invoice immediately. You can also navigate to Invoices in the side panel, to view all invoices.
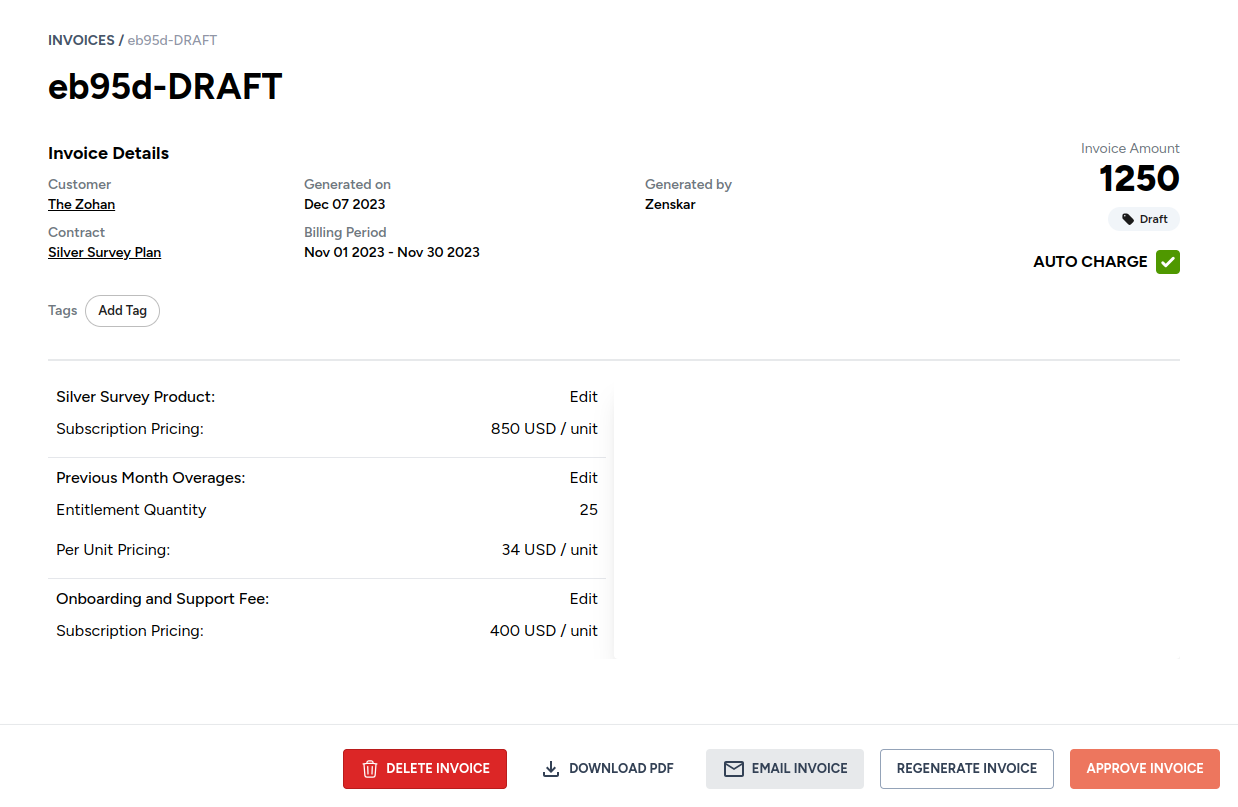
Refer invoice documentation to learn about invoices and operations applicable on invoices.
Updated about 1 year ago
