Installation and setup of Zenskar’s package for Salesforce
Overview
Salesforce package provided by Zenskar allows you to sync your Salesforce account with Zenskar and the flexibility to automate your processes using Flow.
Prerequisites
- You must have permission to install packages in your Salesforce account.
- You must obtain an API key from Zenskar. Refer to How to manage API keys for details.
- Get your organization Id by navigating to the General tab on the Settings page.
Installation
- Reach out to [email protected] for the Salesforce package download link.
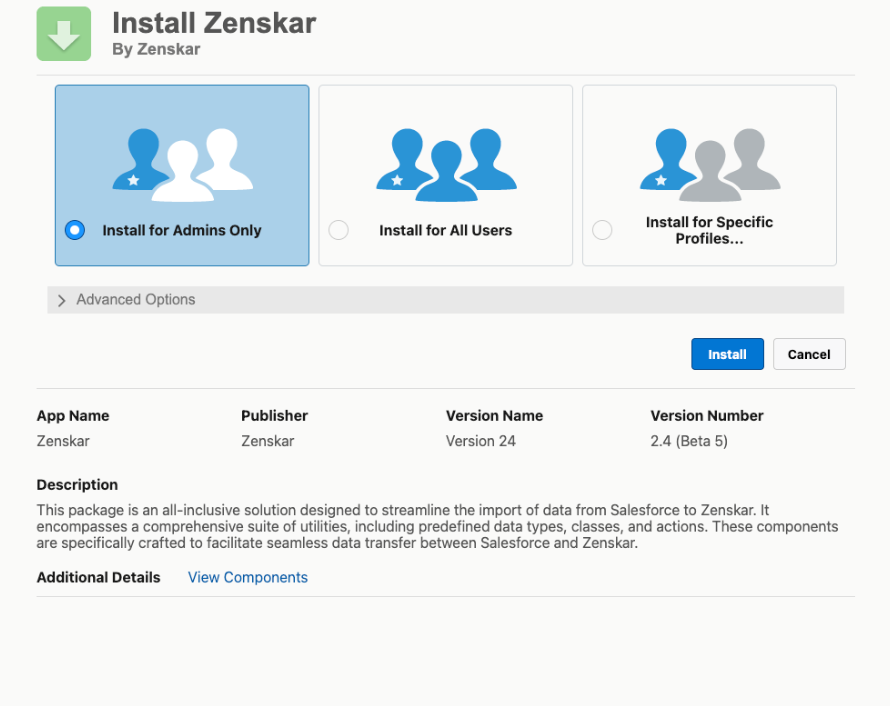
- You will be redirected to the following screen. You can choose one of the following options:
- Install for Admins Only
- Install for All Users (recommended)
- Install for Specific Profiles
NoteYou must login with an account credential that has the required permissions to install the package.
Configuration
Configure Zenskar API key and Organisation Id
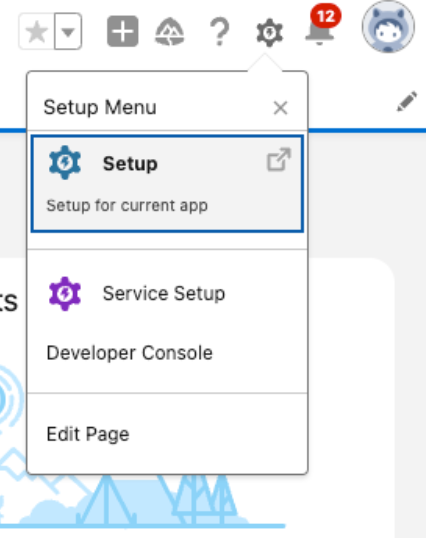
- On successful installation of the package, navigate to the Setup Page on Salesforce.
- Search for Named Credentials, as shown below.
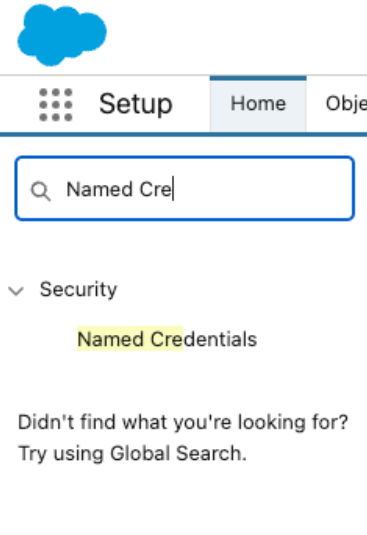
- In Named Credentials you will see the following labels:
- ZenskarEndpoint
- ZenskarStagingEndpoint

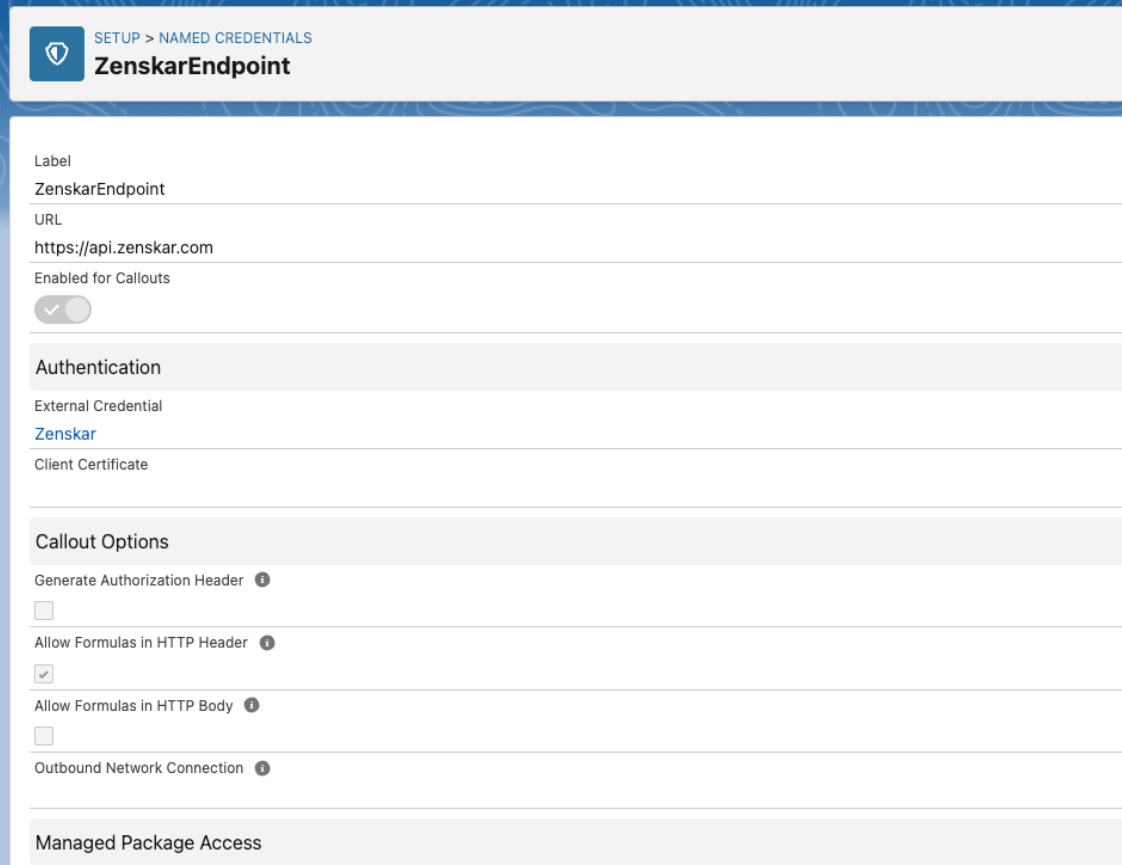
- Click on the ZenskarEndpoint label.
- On the ZenskarEndpoint page**,** click on the value under External Credentials in the Authentication section**.** The value must be Zenskar, if the package was successfully installed.
- On the Zenskar named-credentials page, under the Principals section, click on the Actions drop-down menu available for the ZenskarPrincipal parameter.
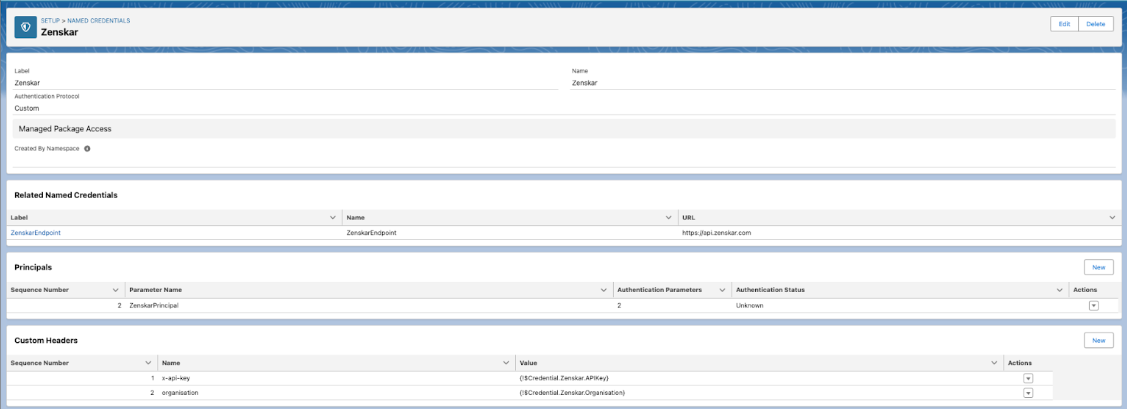
- Select the Edit option from the Actions drop-down menu.

- In the Edit Principal modal dialog, add the following Authentication Parameters:
| Parameter Name | Value |
|---|---|
| APIKey | Generate an API key in the Zenskar dashboard and enter. |
| Organisation | Retrieve your organization ID from the Zenskar dashboard and enter. |
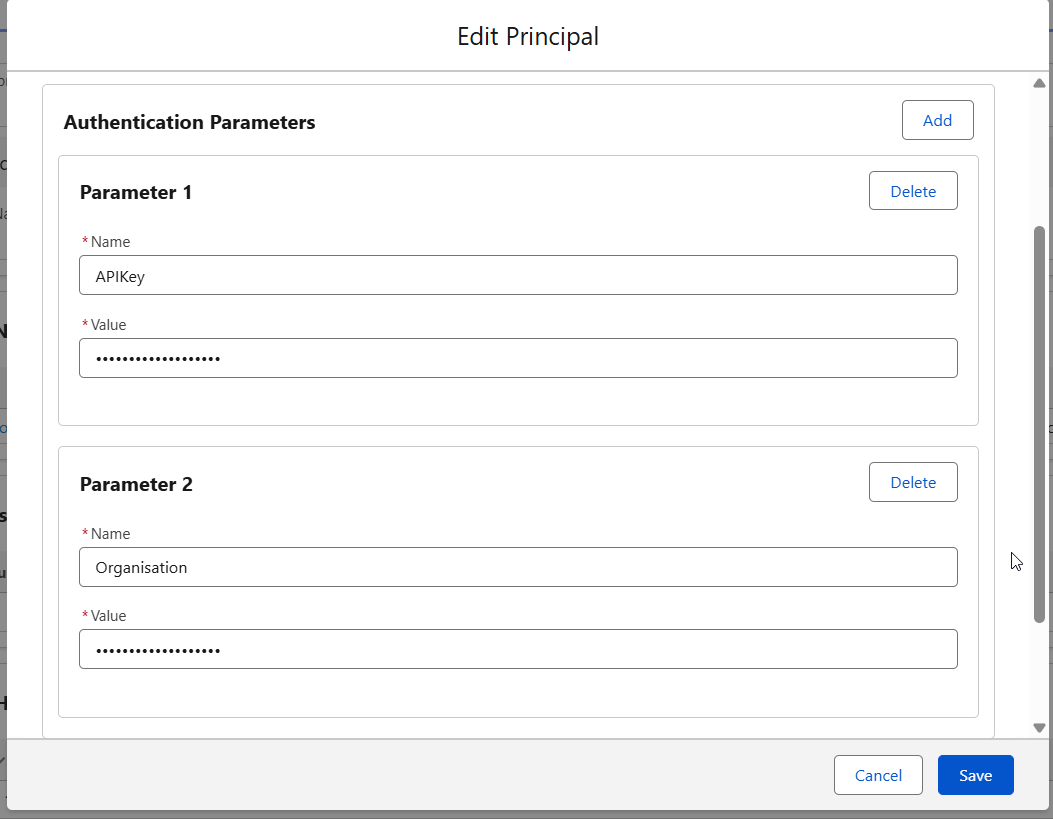
- Once added, click on the Save button to save the configuration.
Provide permission to users for Zenskar External Principal
For more information
Refer to thisSalesforce guide.
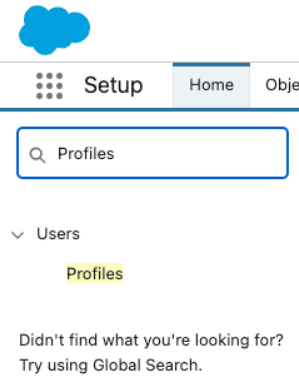
- On the Setup page, search for Profiles
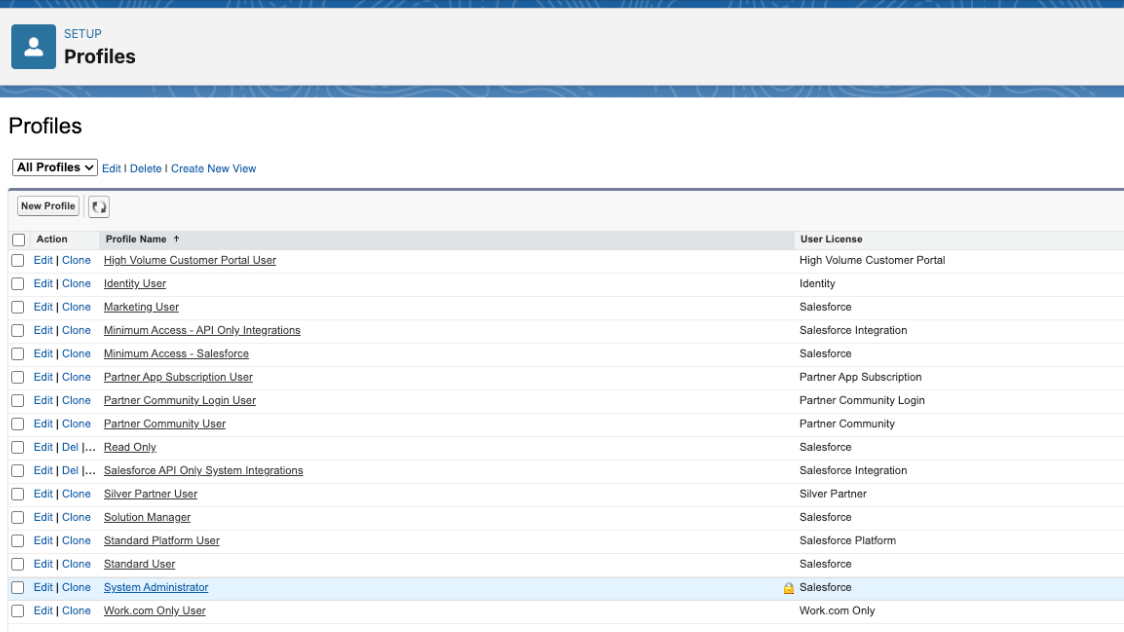
- On the Profile page, search for System Administrator, as shown below.
- Click on the System Administrator profile.
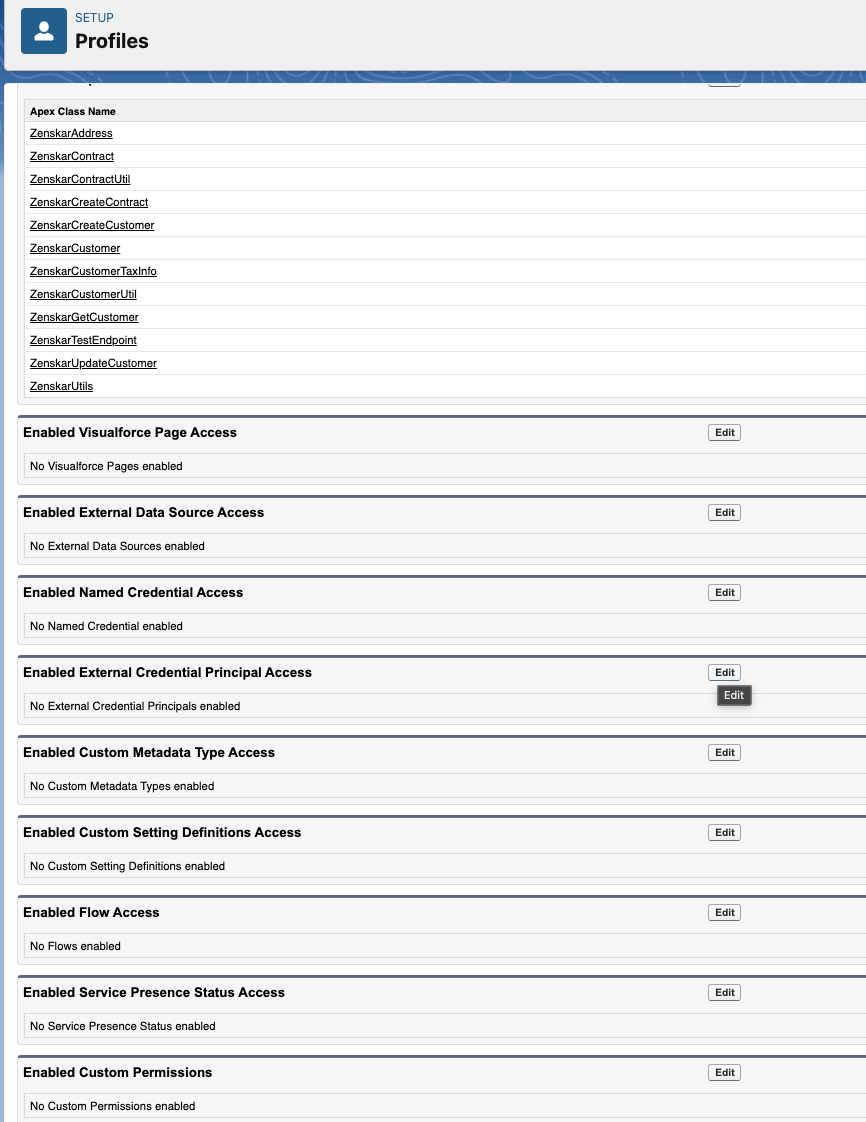
- You will arrive at the Profiles page. Click on Enabled External Credential Principal Access to go to the corresponding settings page.
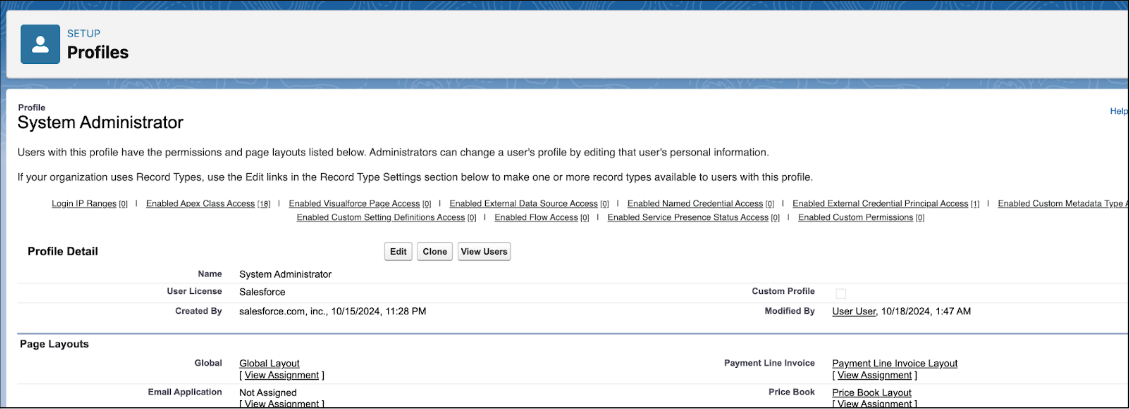
- Click on the Edit button beside the Enabled External Credential Principal Access option, as shown below.
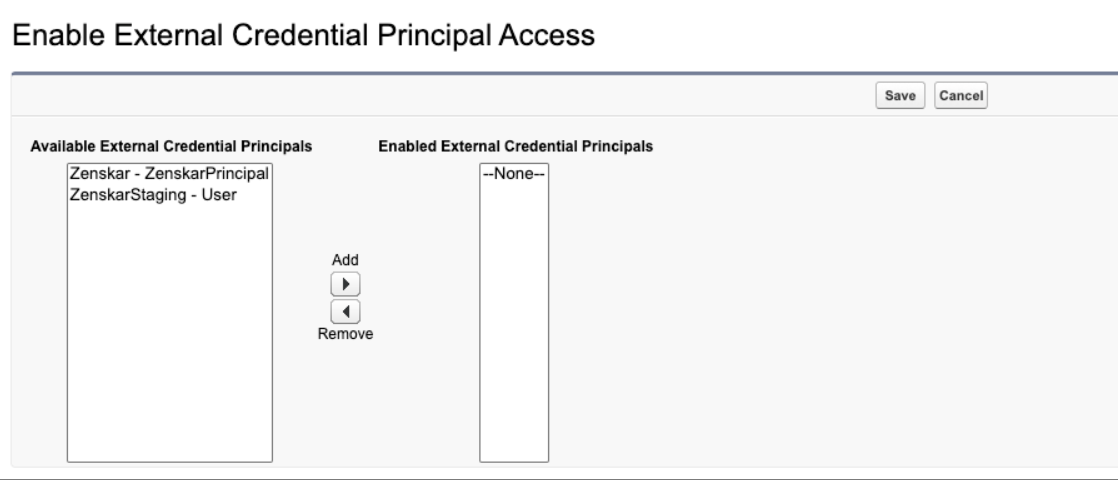
- Select Zenskar - ZenskarPrincipal from the Available External Credential Principals list.
- Click on the Add button to move the selection from the Available External Credential Principals to Enabled External Credential Principals list, as shown below.
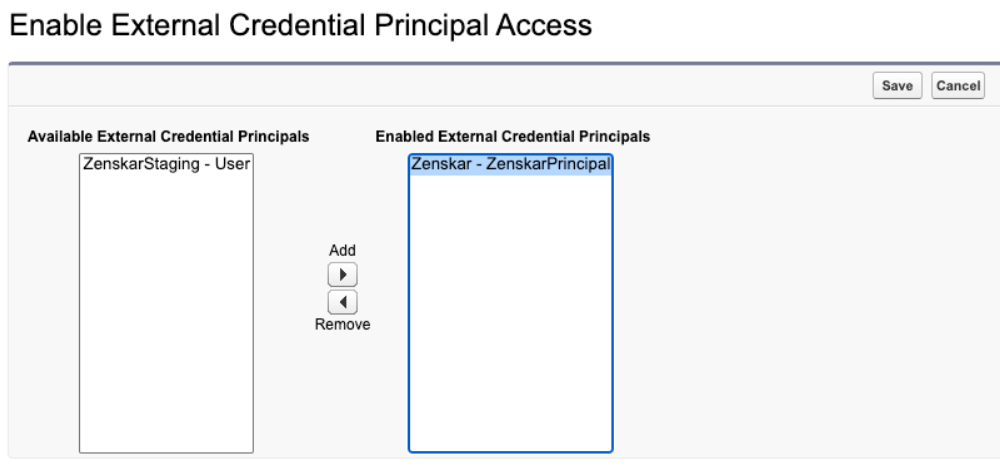
- Once moved, click on the Save button to save the configuration. Your API keys and Organisation are now ready to use.
NoteYou can repeat the above steps to provide access to other users.
Set up Salesforce object layout
You can enable Custom Fields on Objects Layout to allow seamless integration.
Available custom fields
| Account |
|---|
| AutoCharge Invoice (Zenskar) |
| CustomerID (Zenskar) |
| Email (Zenskar) |
| Email Communication (Zenskar) |
| External ID (Zenskar) |
| Opportunity |
|---|
| Contract End Date (Zenskar) |
| Contract ID(Zenskar) |
| Contract Renew Policy (Zenskar) |
| Contract Start Date (Zenskar) |
| Product |
|---|
| ProductID (Zenskar) |
| PriceBookEntry |
|---|
| LinkID (Zenskar) |
NoteLinkID (Zenskar) acts as the Reference ID on Zenskar.
| Needed only if creating per-unit pricing on Salesforce |
|---|
| Billing Cadence Every (Zenskar) |
| Billing Cadence Offset (Zenskar) |
| Billing Cadence Period (Zenskar) |
| Discount Percentage (Zenskar) |
| Is Recurring(Zenskar) |
| Pricing Unit (Zenskar) |
NoteIf you choose to use Salesforce fields, update Flows accordingly.
- Go to the Setup Home page.
- Click on Object Manager and search for Account.
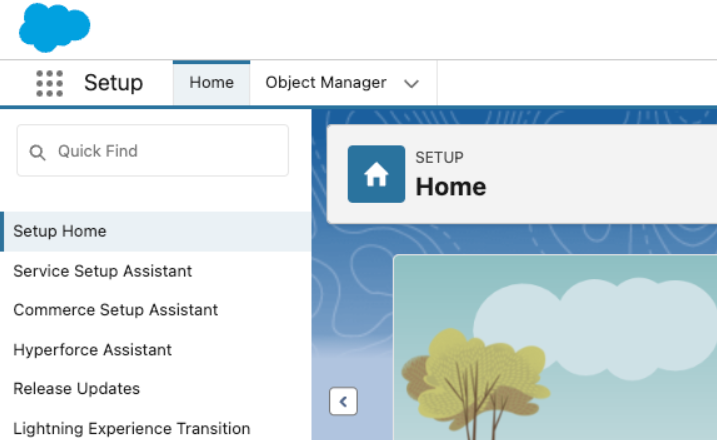
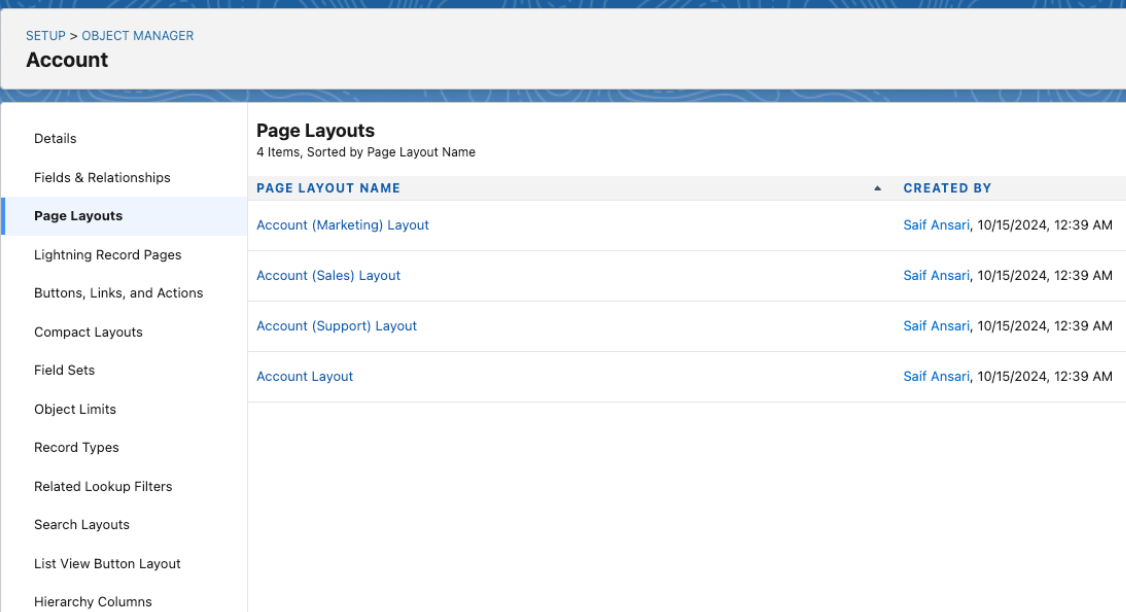
- Click on Account to arrive at the Account page.

- On the accounts page, click on Page Layouts in the left sidebar.
- Click on Account Layout, as shown below**.**
- On the Account Layout page, all available fields are shown in the Account Layout section, whereas the fields associated with account are shown in the Account Sample section.
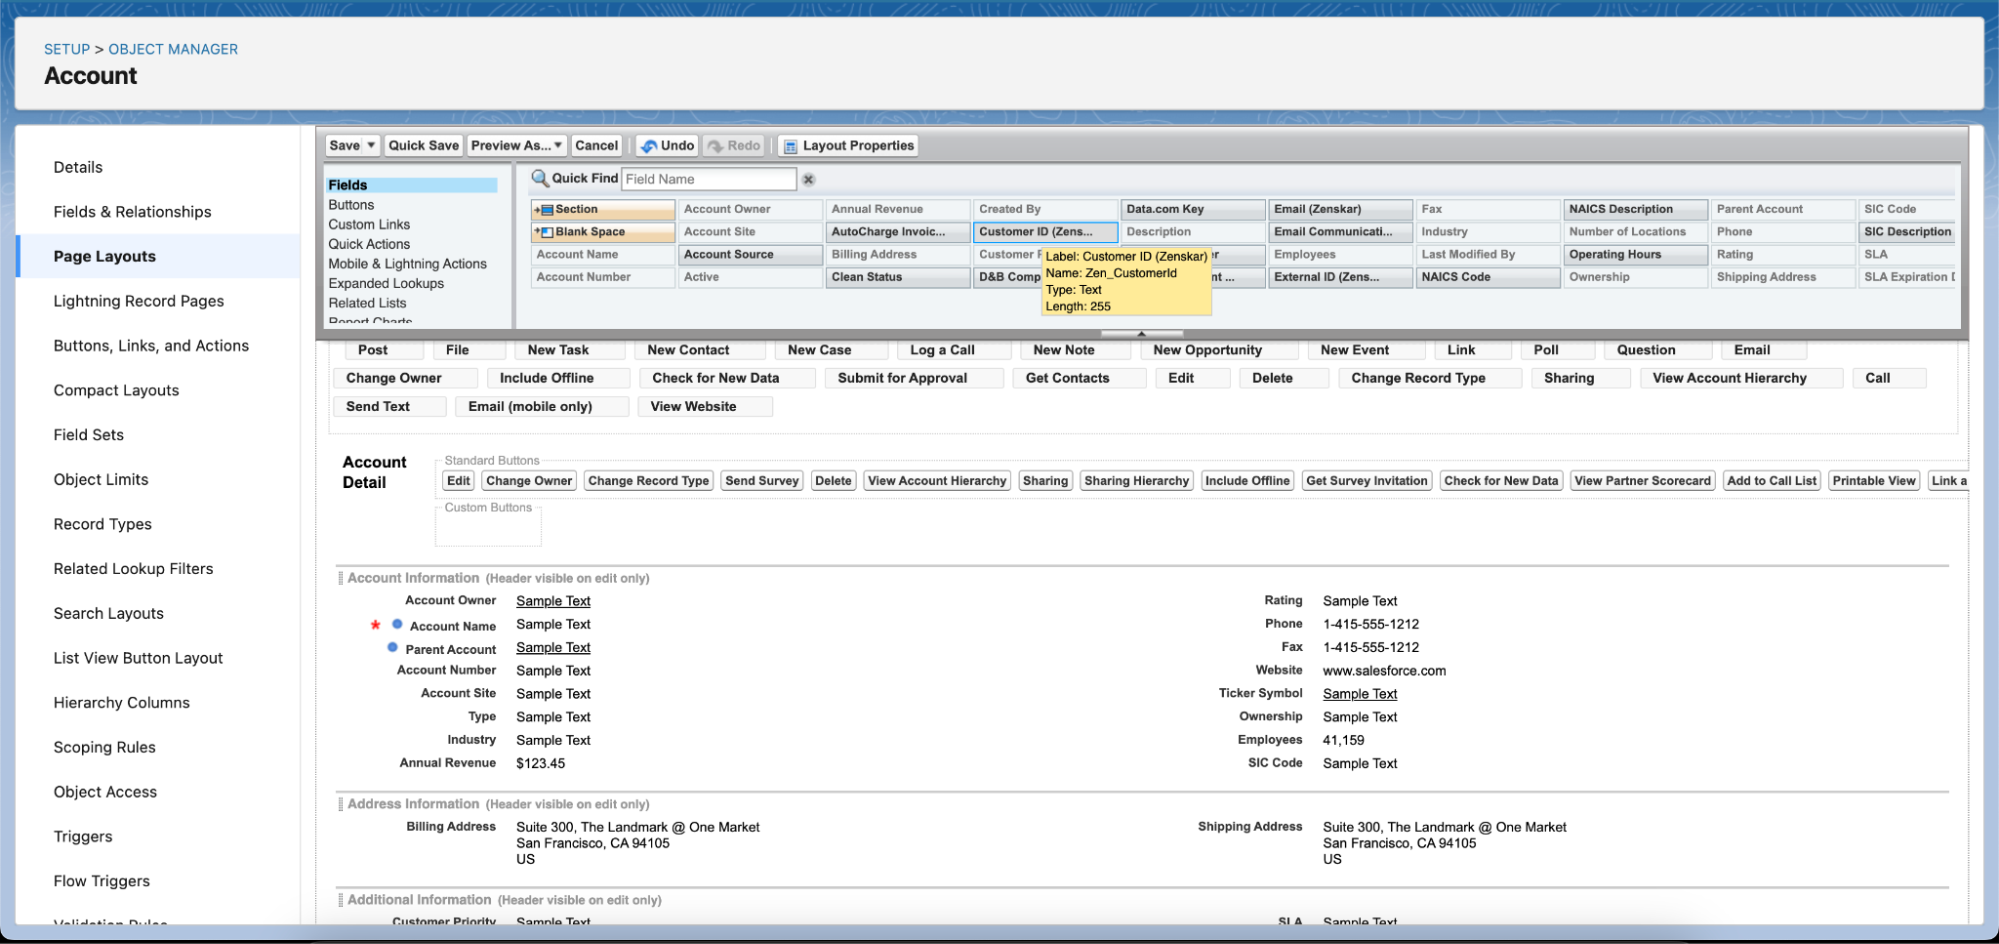
- On the Account Layout page, move all the fields with (Zenskar) suffix to Account Information section.
- Once added, click on the Save button.
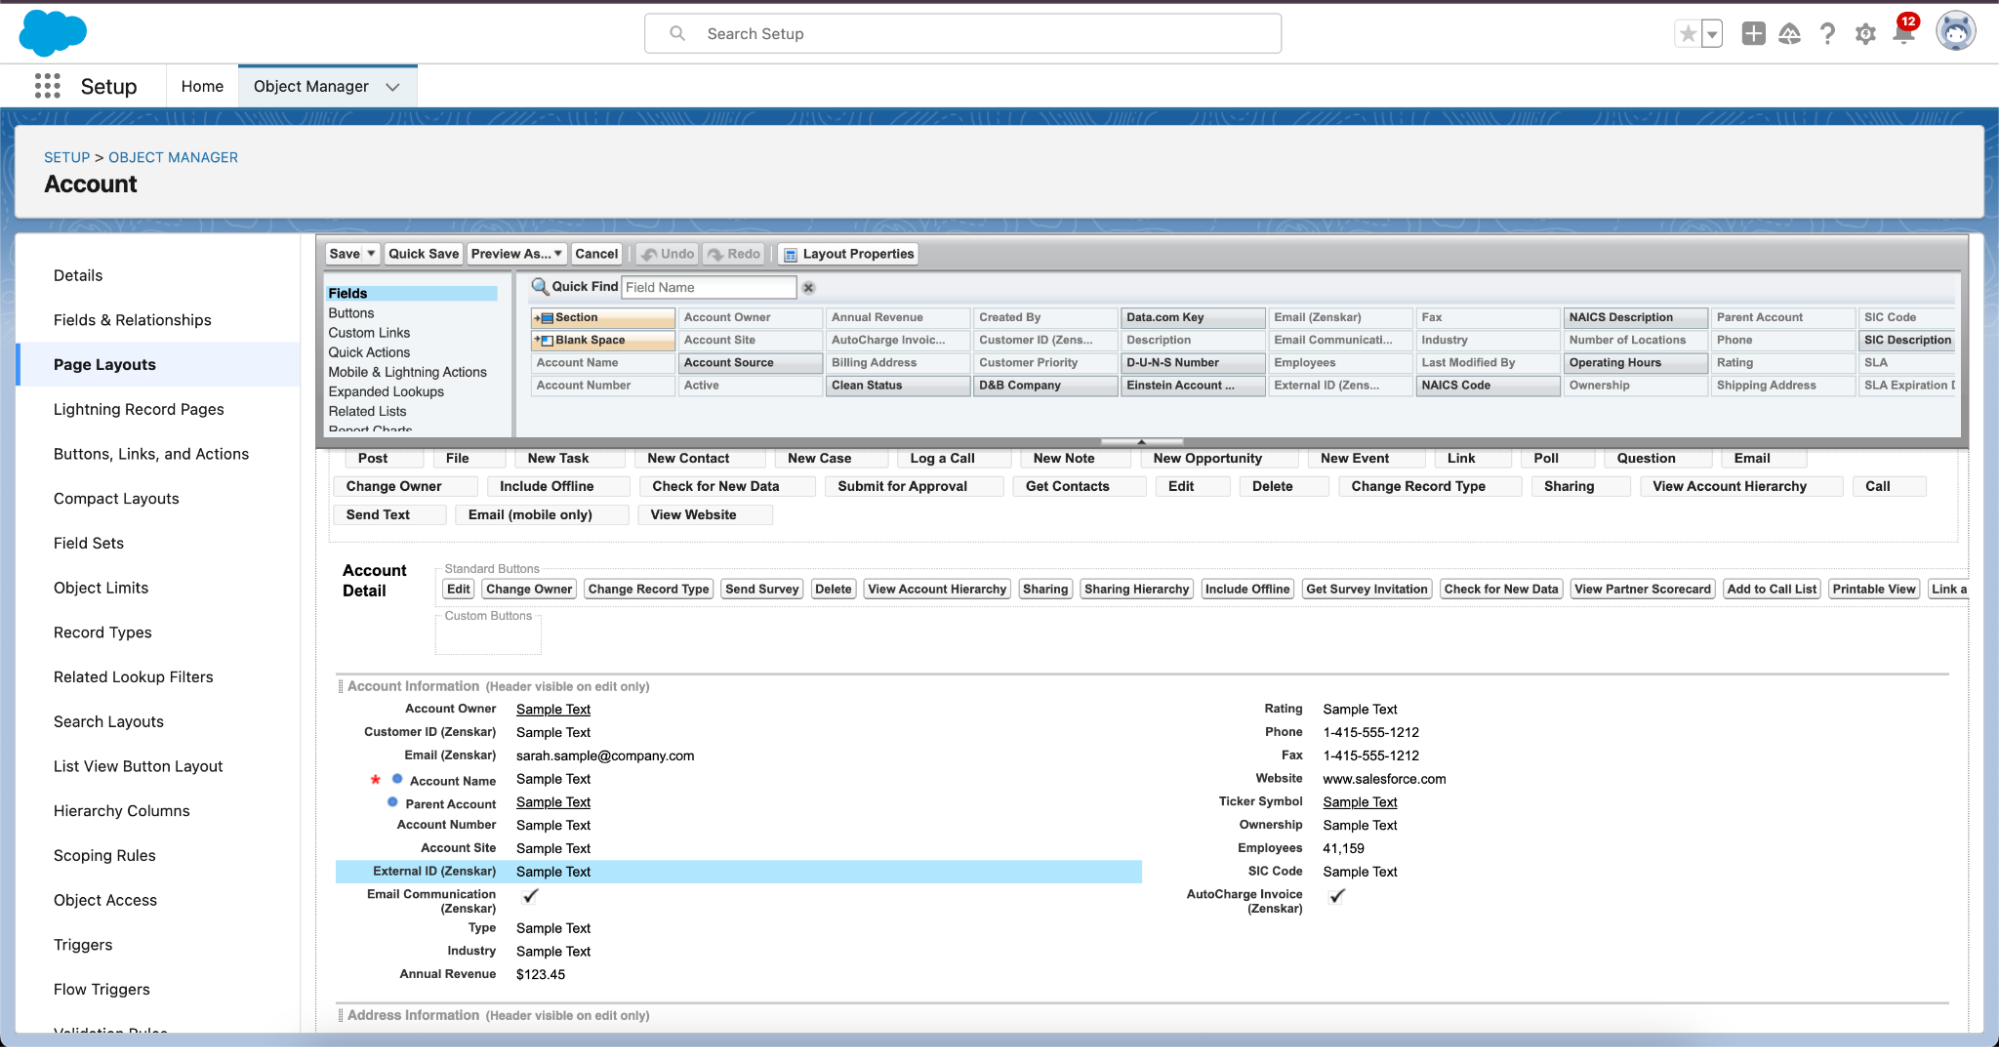
Successful completion of this activity will make all Zenskar fields available when you create or edit an account on Salesforce.
WARNING
Steps 1–8 must be repeated to show custom fields in the layouts for Opportunity, Product, and PricebookEntry by updating the default/active layout pages for each of these objects.
Activate Zenskar Default Flow
The Zenskar Default Flow is in a deactivated state, by default. To activate,
- Go to Flows.
- Open Zenskar Default Flow.
- Click Activate
Updated 23 days ago
